In this guide, we will setup our system to run docassemble without using the playground or a server.
This allows us to use a regular text editor, save our work so we can collaborate on interviews with colleagues and we get an easier way to use MS docx templates with docassemble.
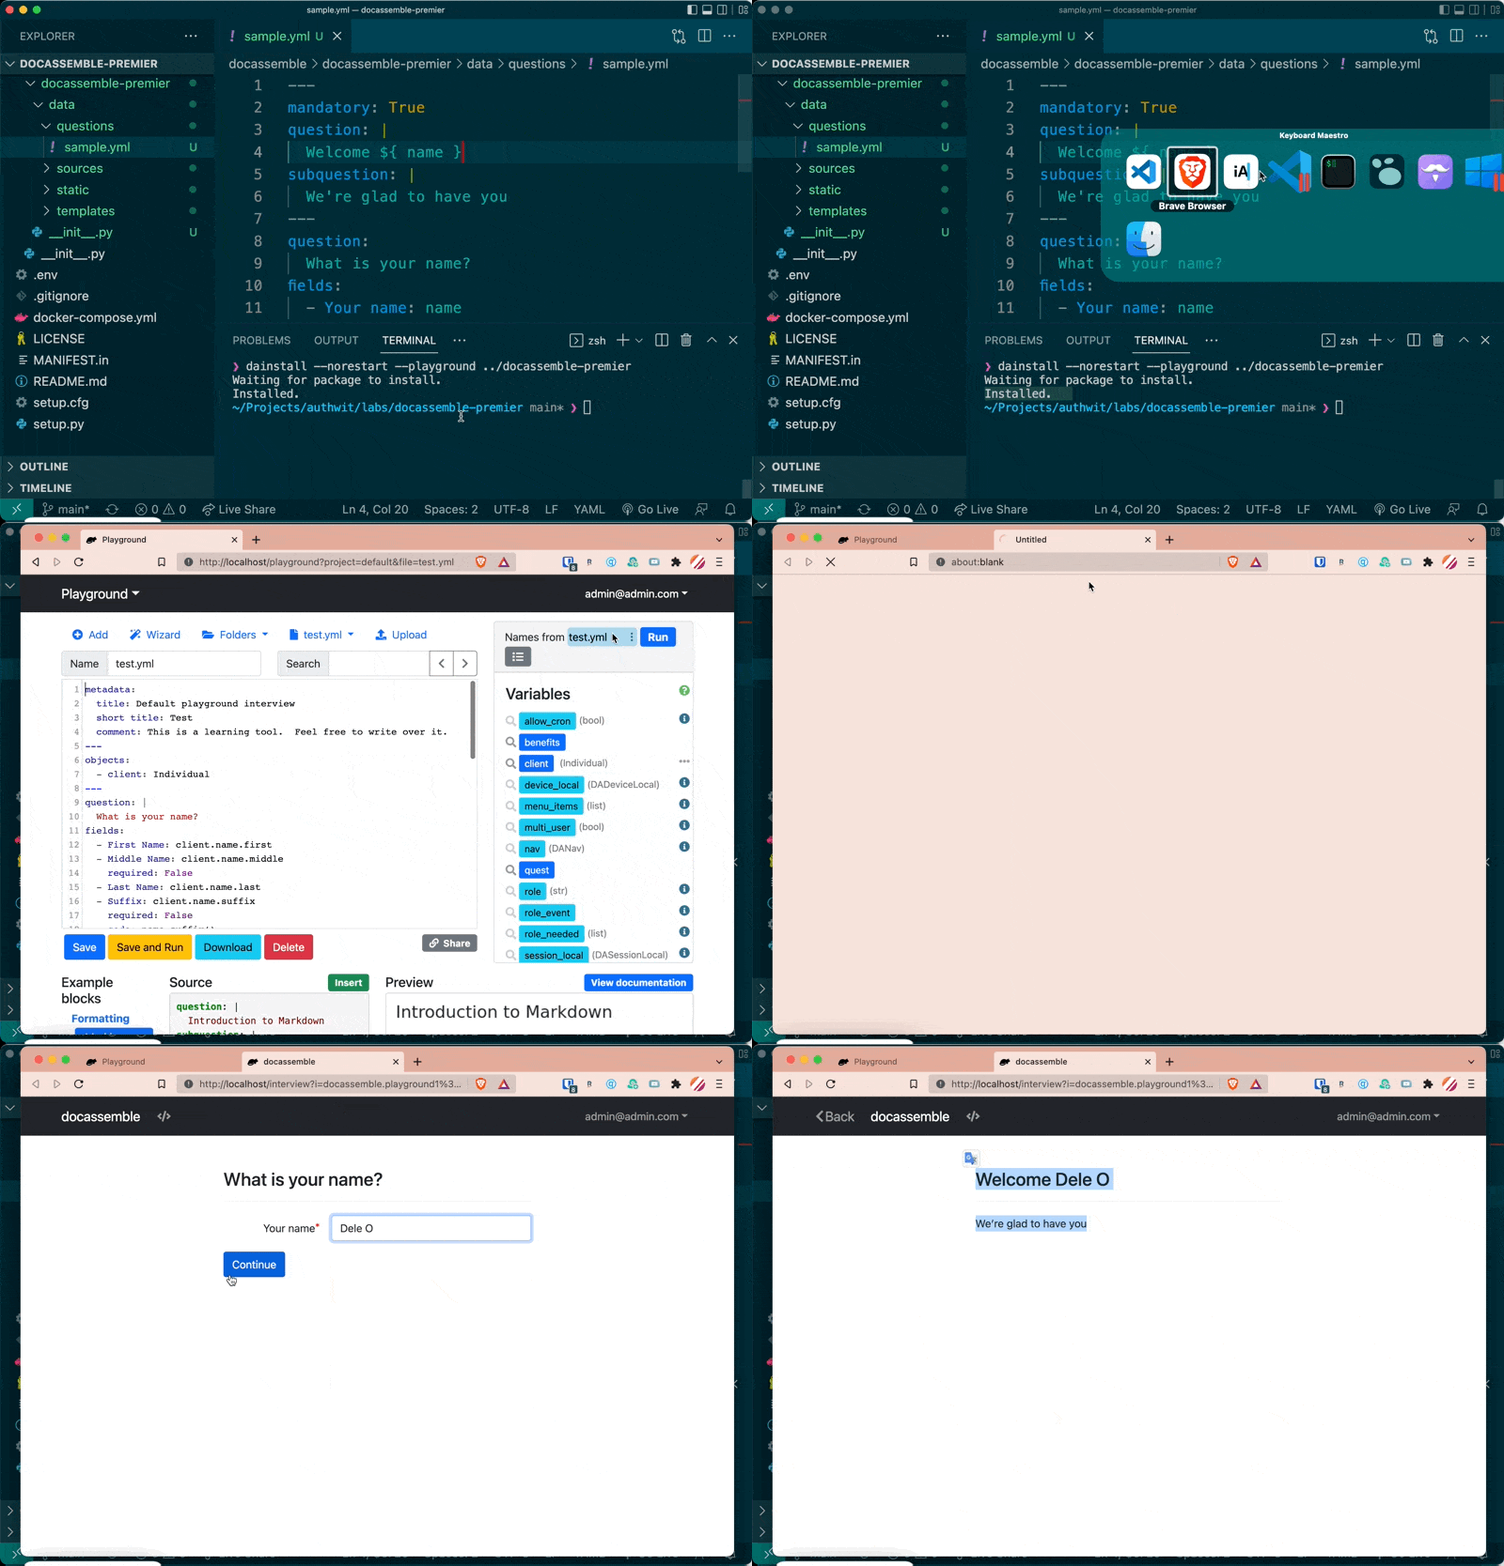
At the end of this guide, you will be able to design an interview this way:
Requirements to install docassemble on your system
First, confirm your system has these minimum requirements:
- It meets the minimum requirement to install the app, docker
- You have a stable internet connection. Some of the apps you will download and install through this process are heavy.
If you’re good with this, let’s get into the steps.
Install docker for docassemble
Docker is like a computer within your computer. It allows you to run an application that you won’t otherwise be able to install and run on your computer.
Let’s install it:
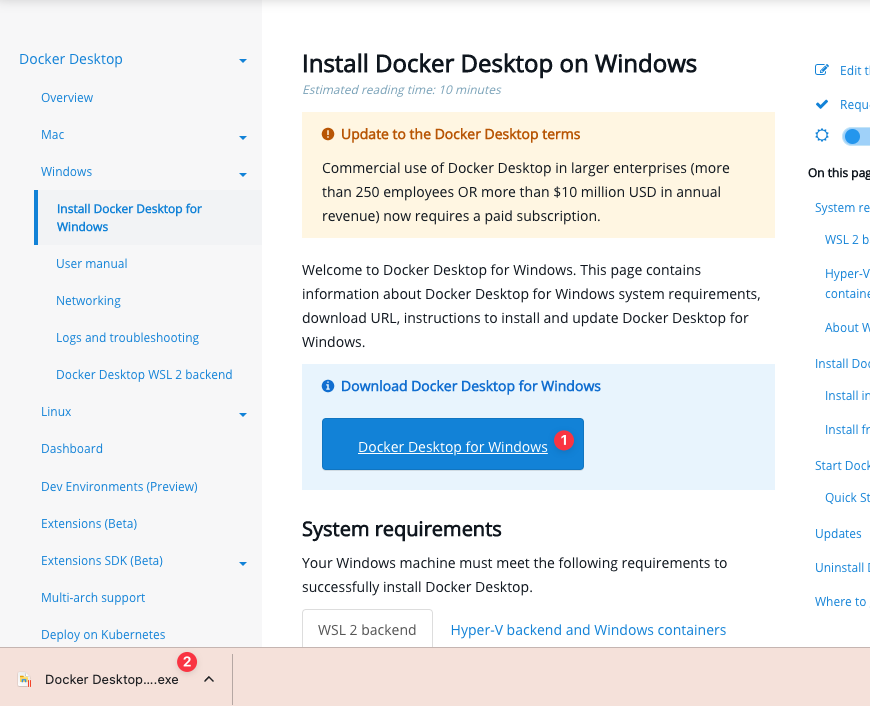
Go to docker’s website and download the proper version for your operating system. Through the rest of this guide, I will use Windows.
When the download is complete, we’ll run the installation file. I’m starting from this point:
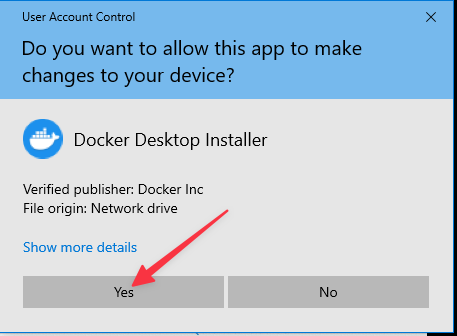
As I open it, I get this notification:
Continue the rest of the install. Accept all the default options.
With docker installed, we install the software that allows us to track changes to our files, Git and GitHub.
Install Github and Git to allow docassemble Source Control
Go to https://desktop.github.com/ to download GitHub Desktop.
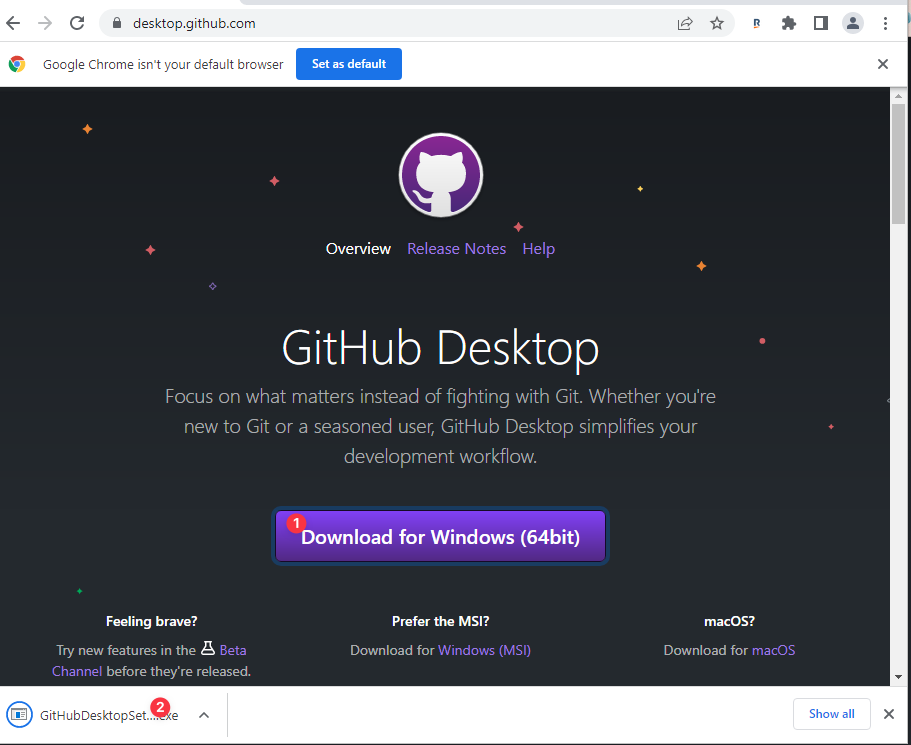
While installing this is all you see:
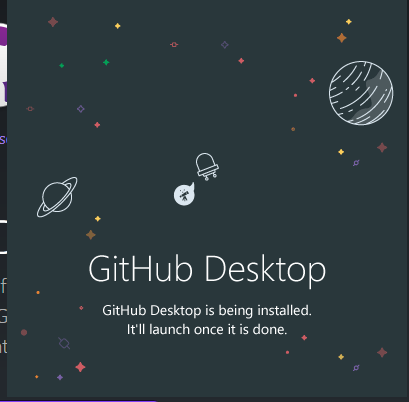
Hang in there, it’s installed in the background.
When it’s complete, you get this screen:
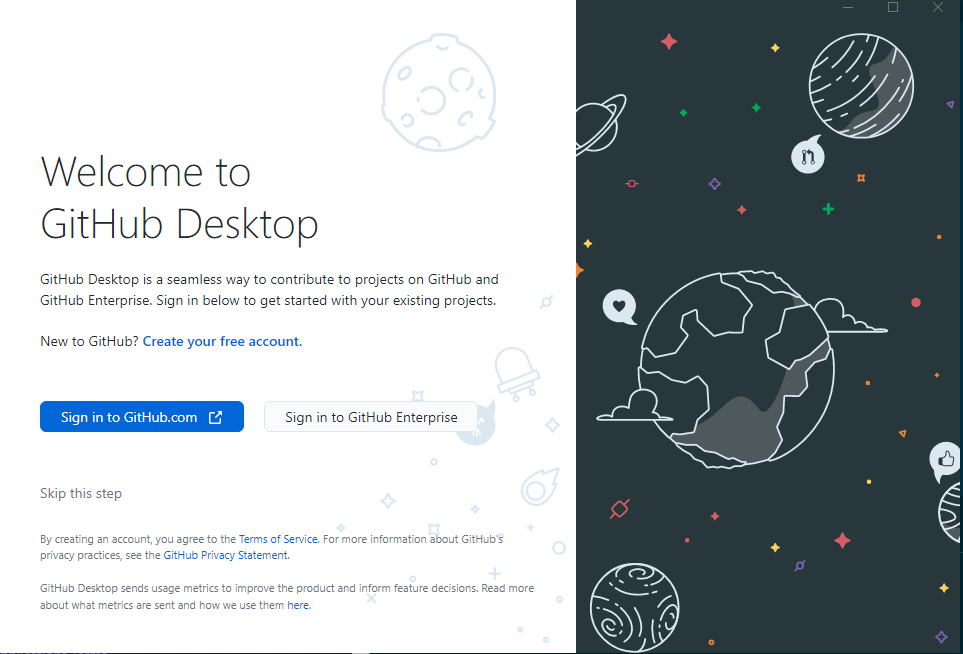
At this point, you have 2 options:
If you don’t have a GitHub account , click Create your free account or do it here, then continue to the next step.
With your new (or exciting) GitHub account, click the Sign in to GitHub.com.
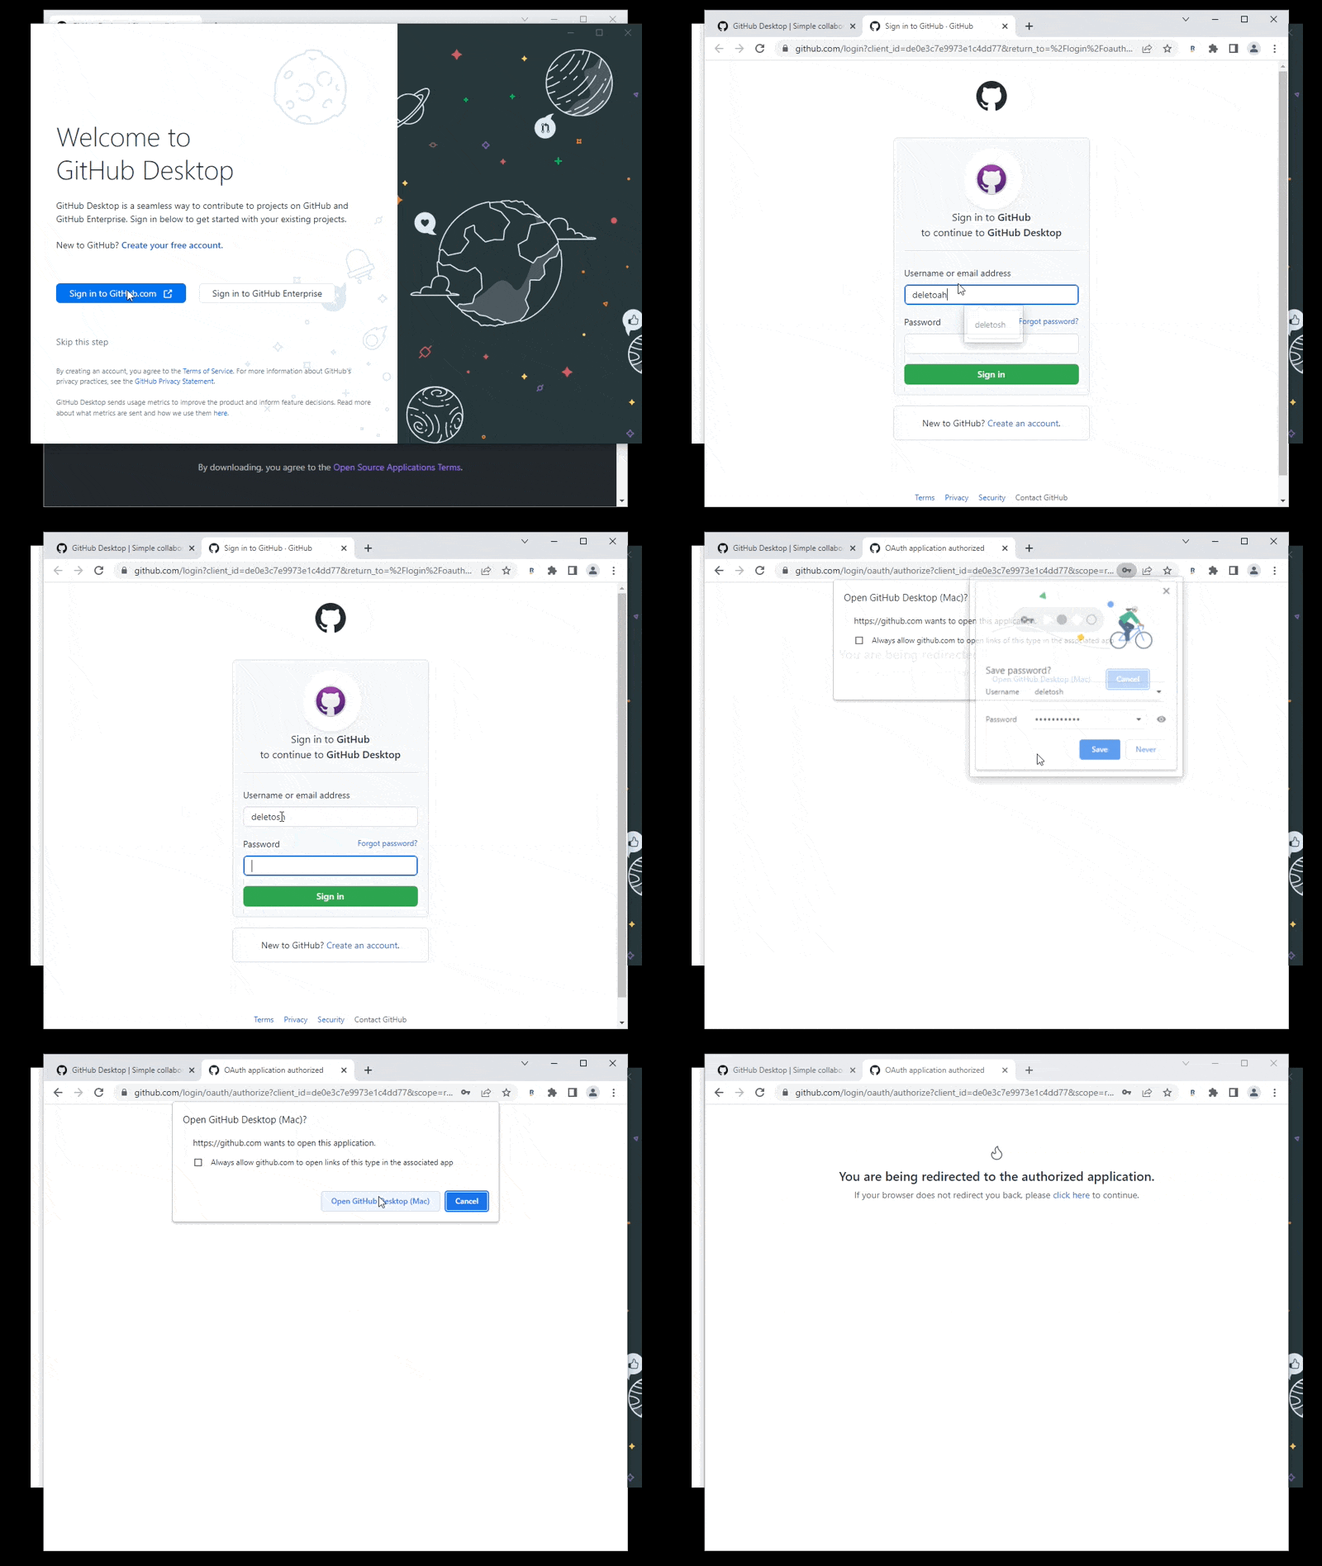
When that’s complete, it brings us back to this:
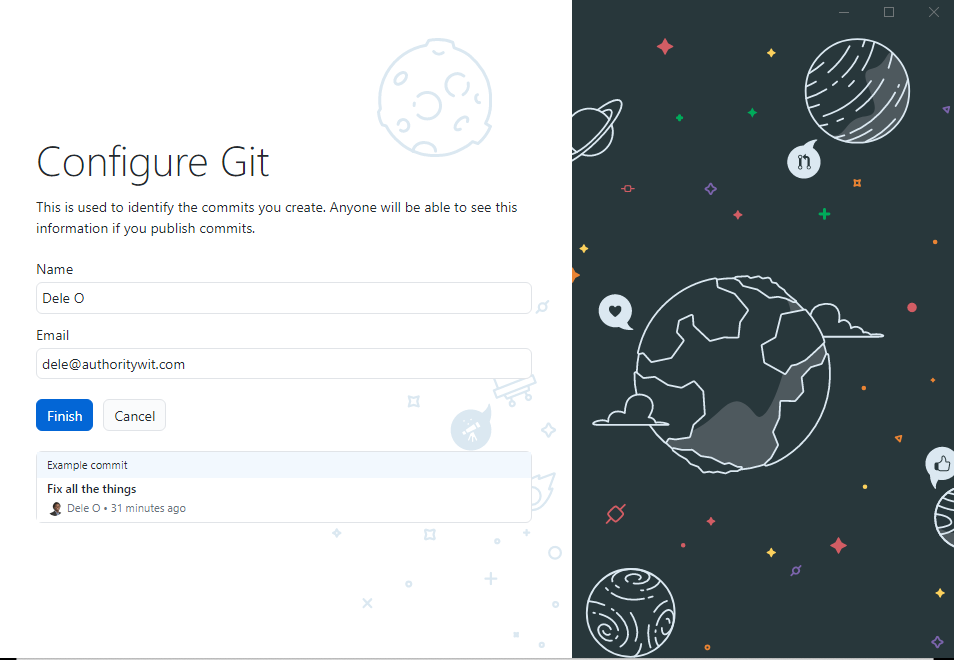
Confirm the details are correct and click Finish.
With this done, we’re ready to start automating our documents with Docassemble.
Write a sample docassemble interview from your system
To confirm all works, we will try a sample document assemble project.
Open your GitHub desktop. Click Clone a repository from the Internet… select URL, in the text box enter: deletosh/docassemble-premier then click Clone.
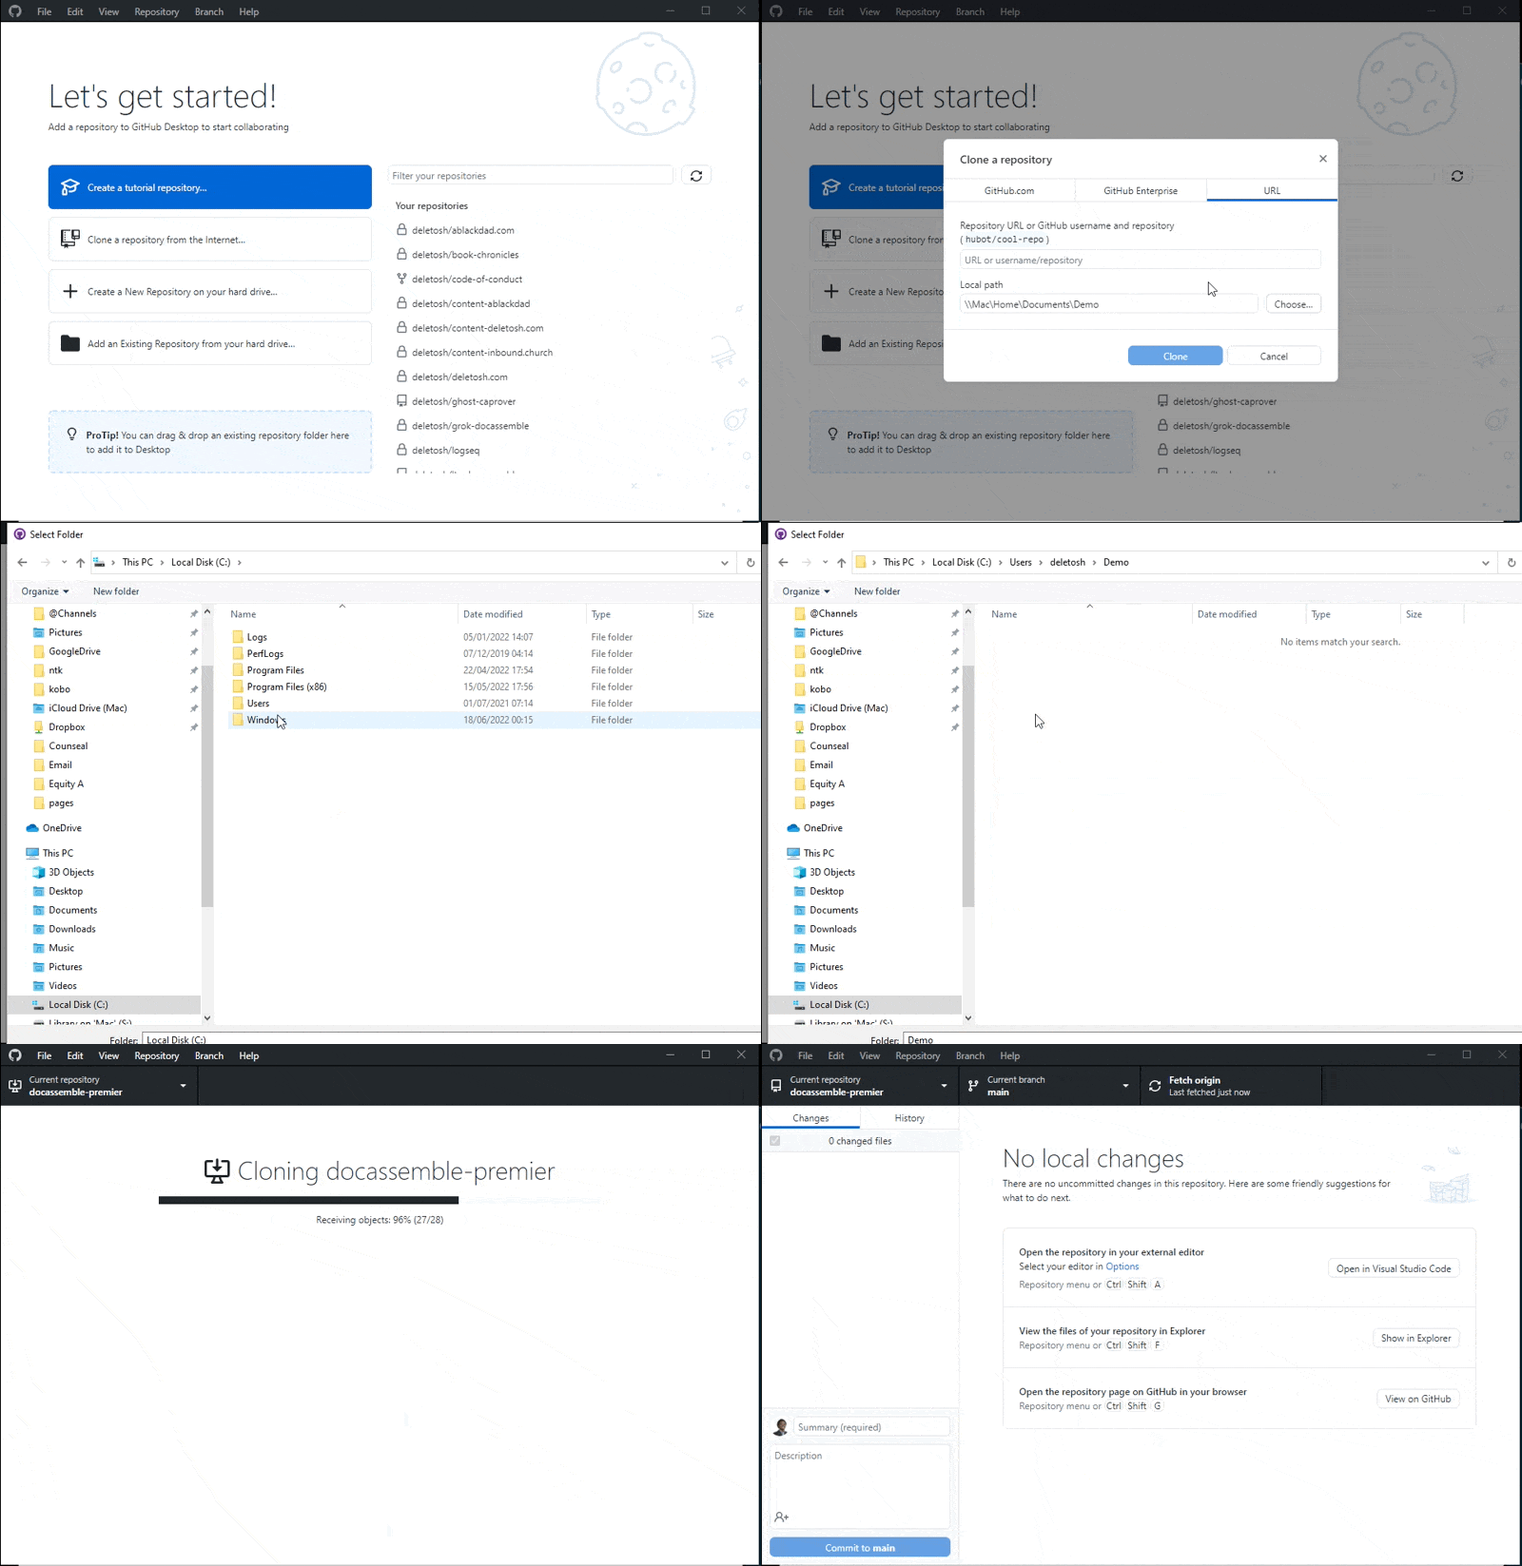
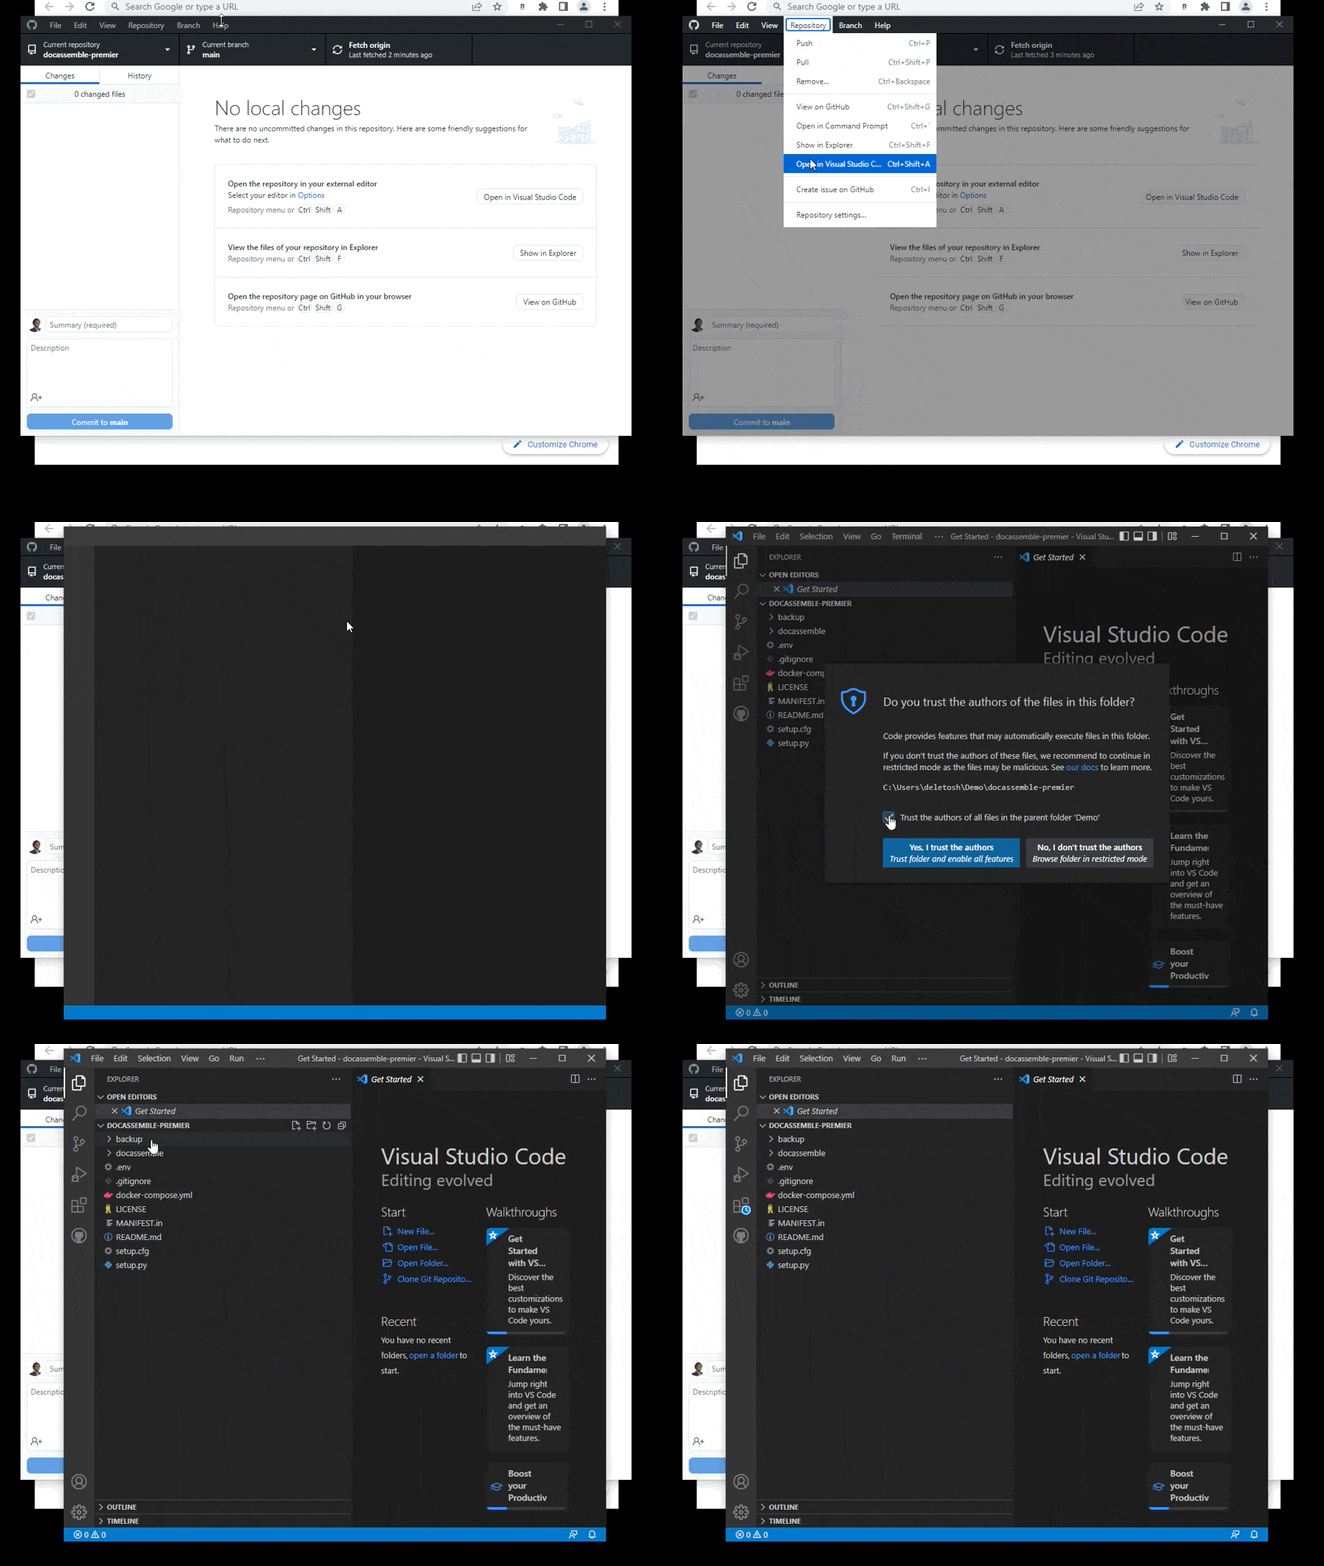
Finally, to see what all the files look like, hit Repository > Open in Visual Studio
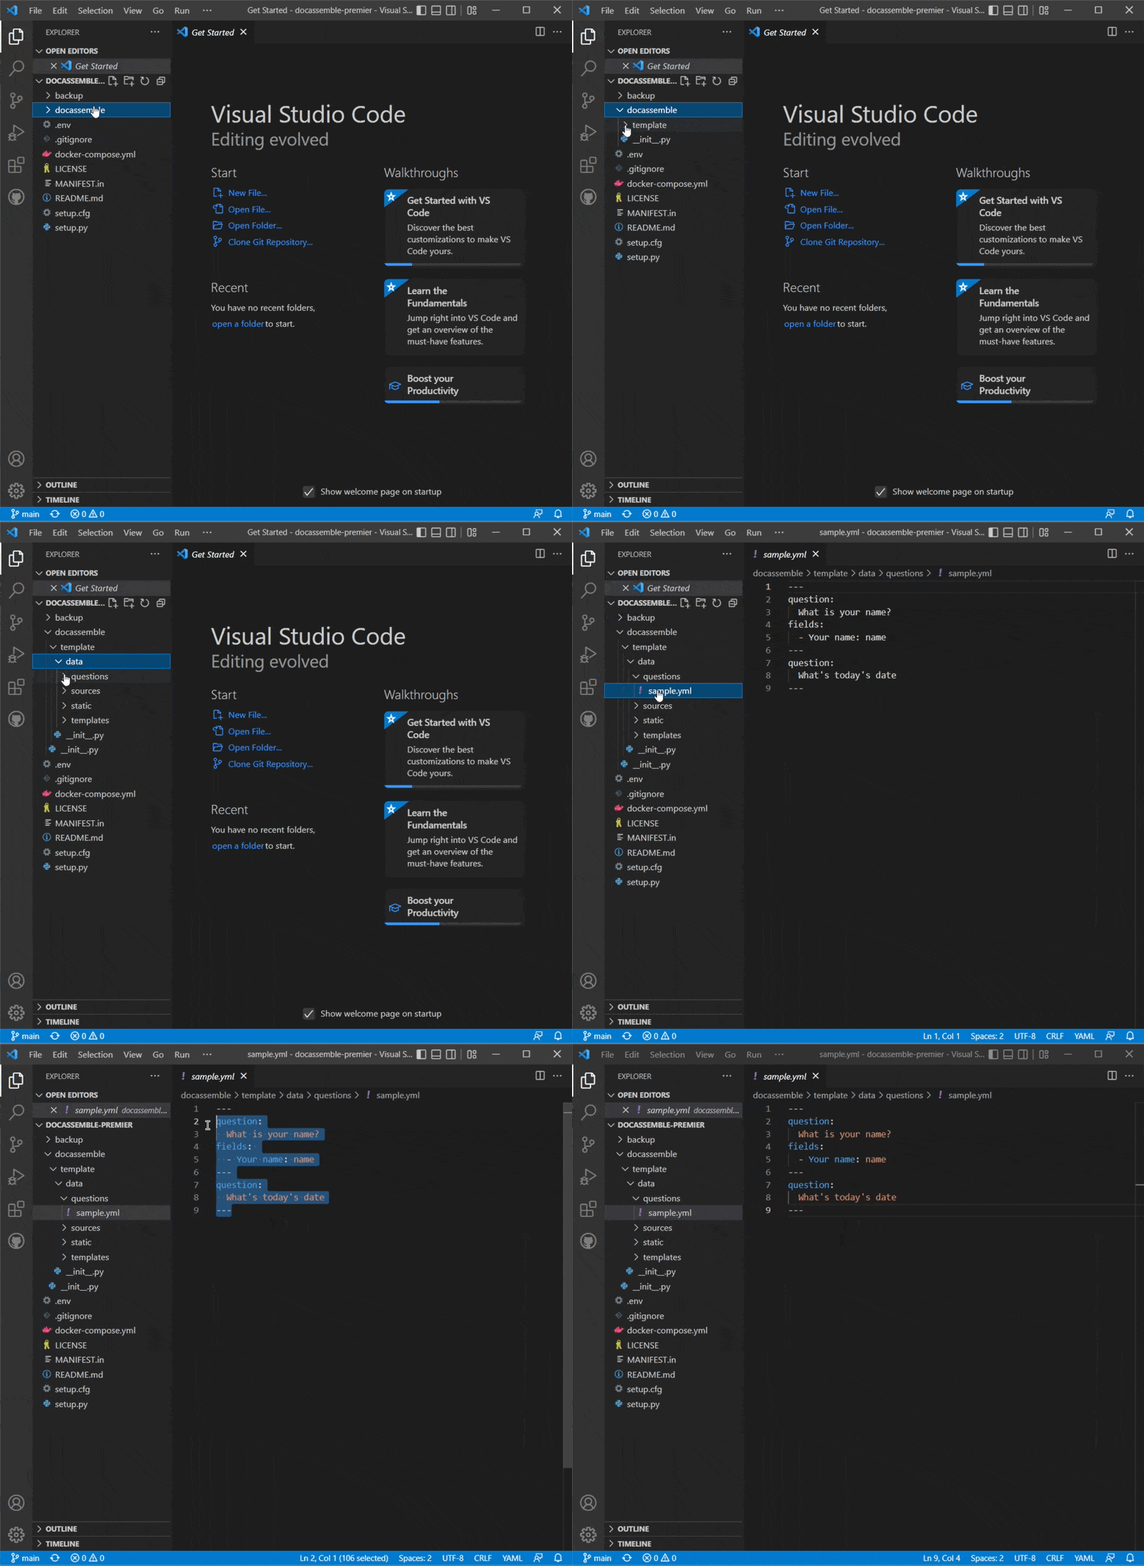
With our VS Code open, confirm we can run an interview on our computer. Click through docassemble > template > questions then open sample.yml
To make working with coding docassemble easier, we want to add additional customization to VS Code.
Install an alternative to Window’s “cmd”, Clink
We will be type several commands in the terminal (sometimes called, command line, or cmd.exe). It’s that app on Windows that looks like this:
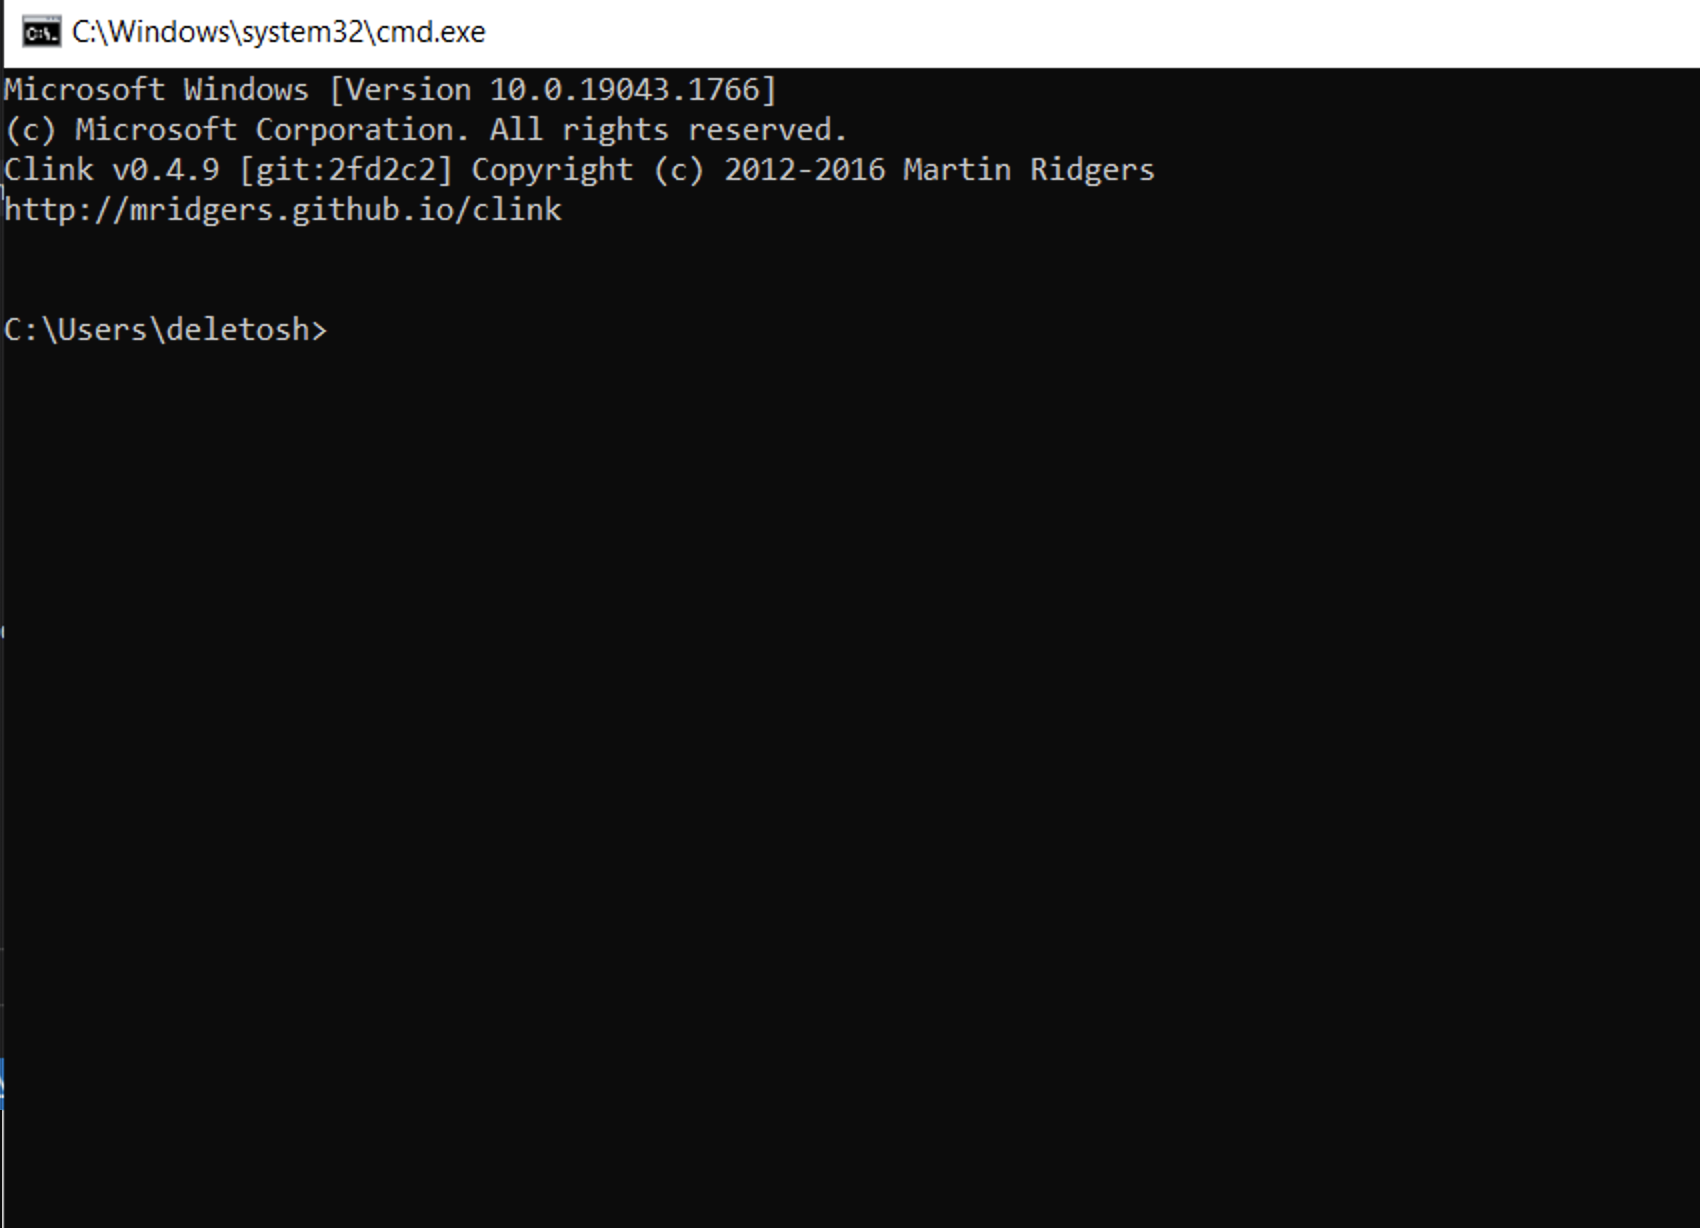
We want this to work better and make it easier to use inside VS code.
Go to https://mridgers.github.io/clink and EXE (installer)
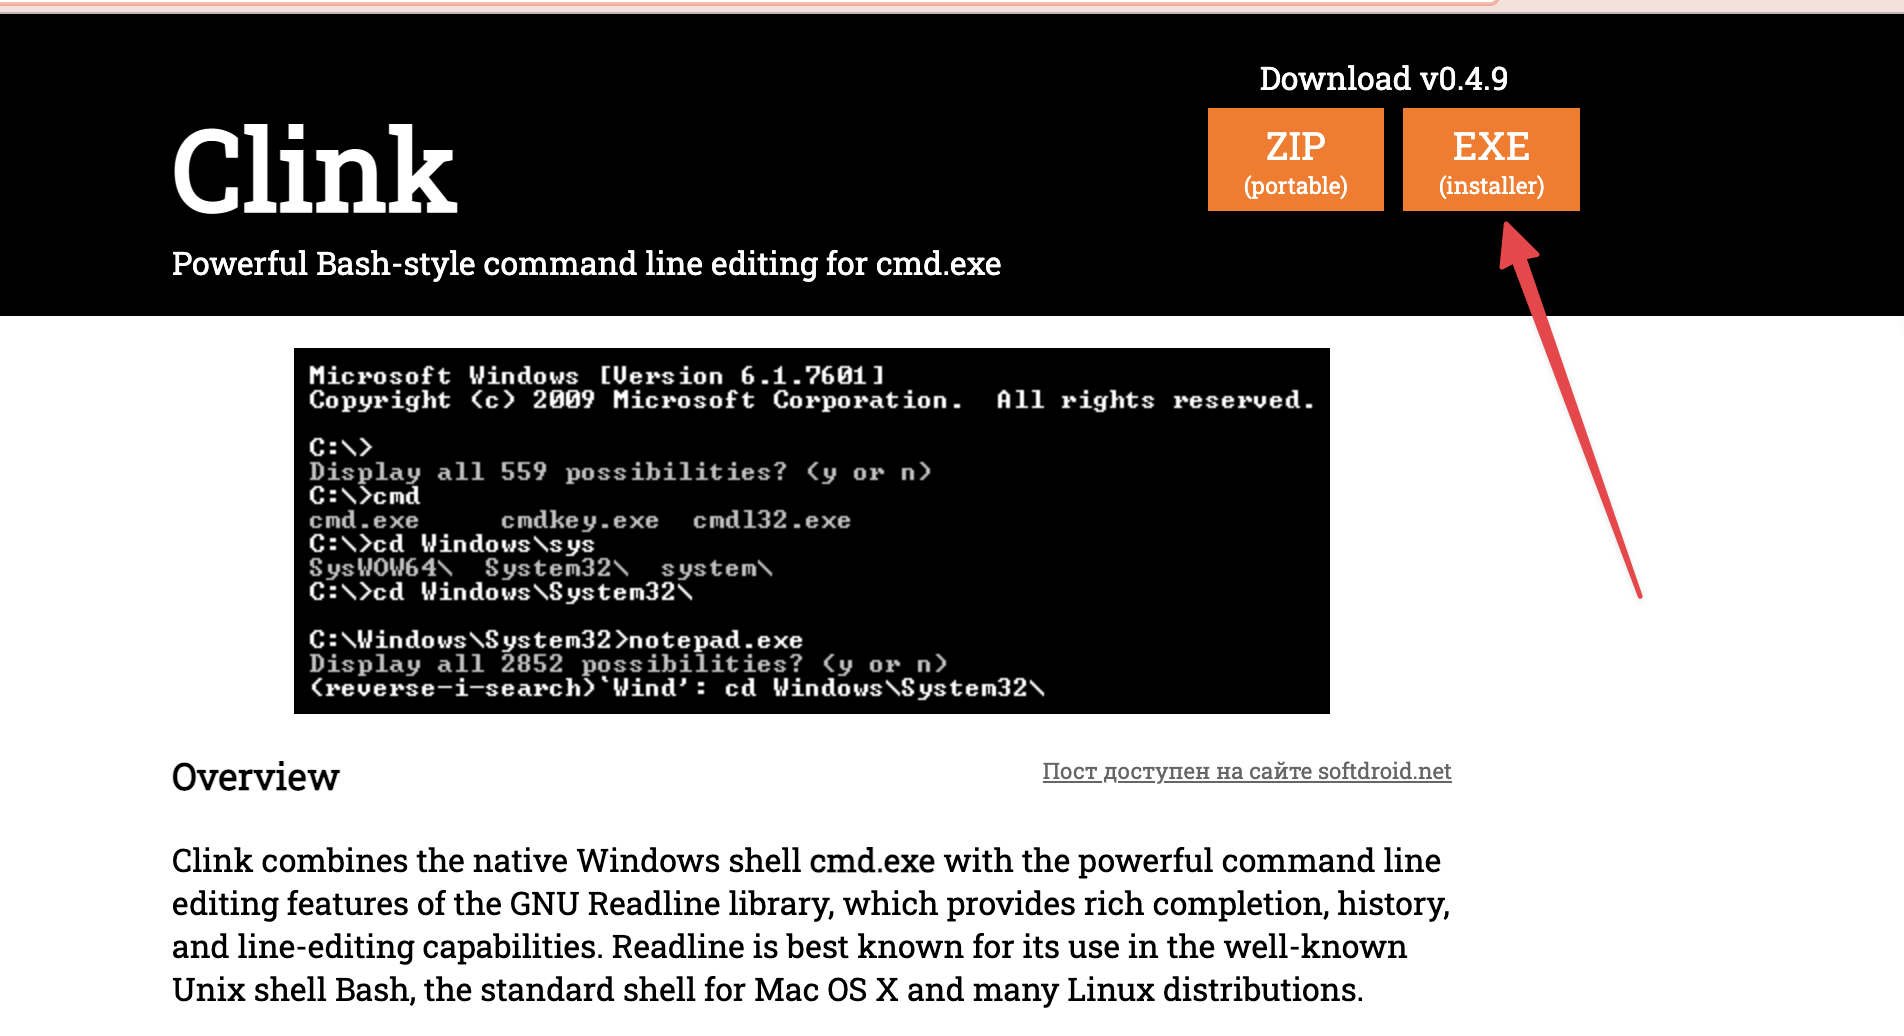
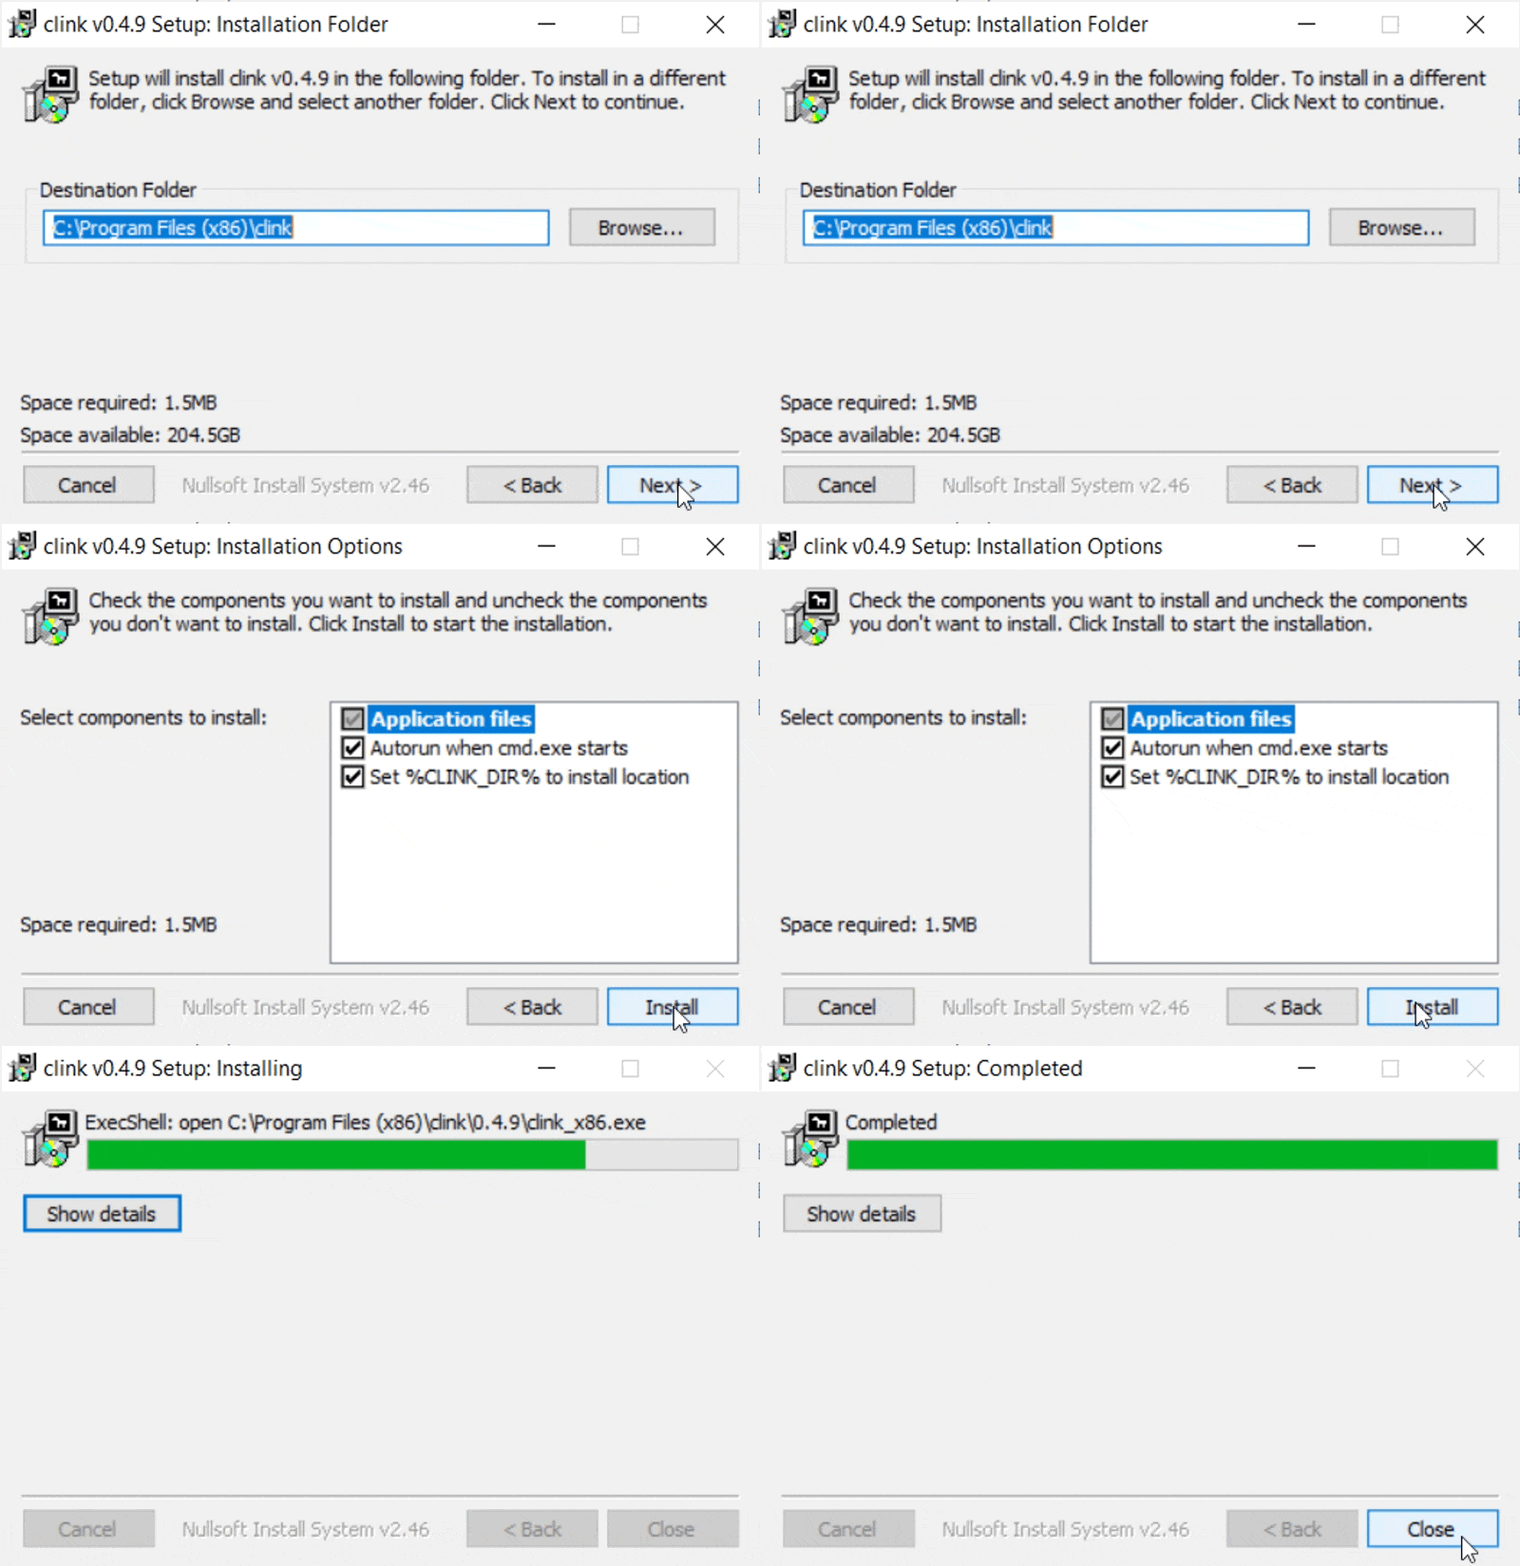
Once you downloaded this, open and install the file. Keep all the default options.
Take note of where we installed the app. Mine is at C:Program Files (x86)clink.
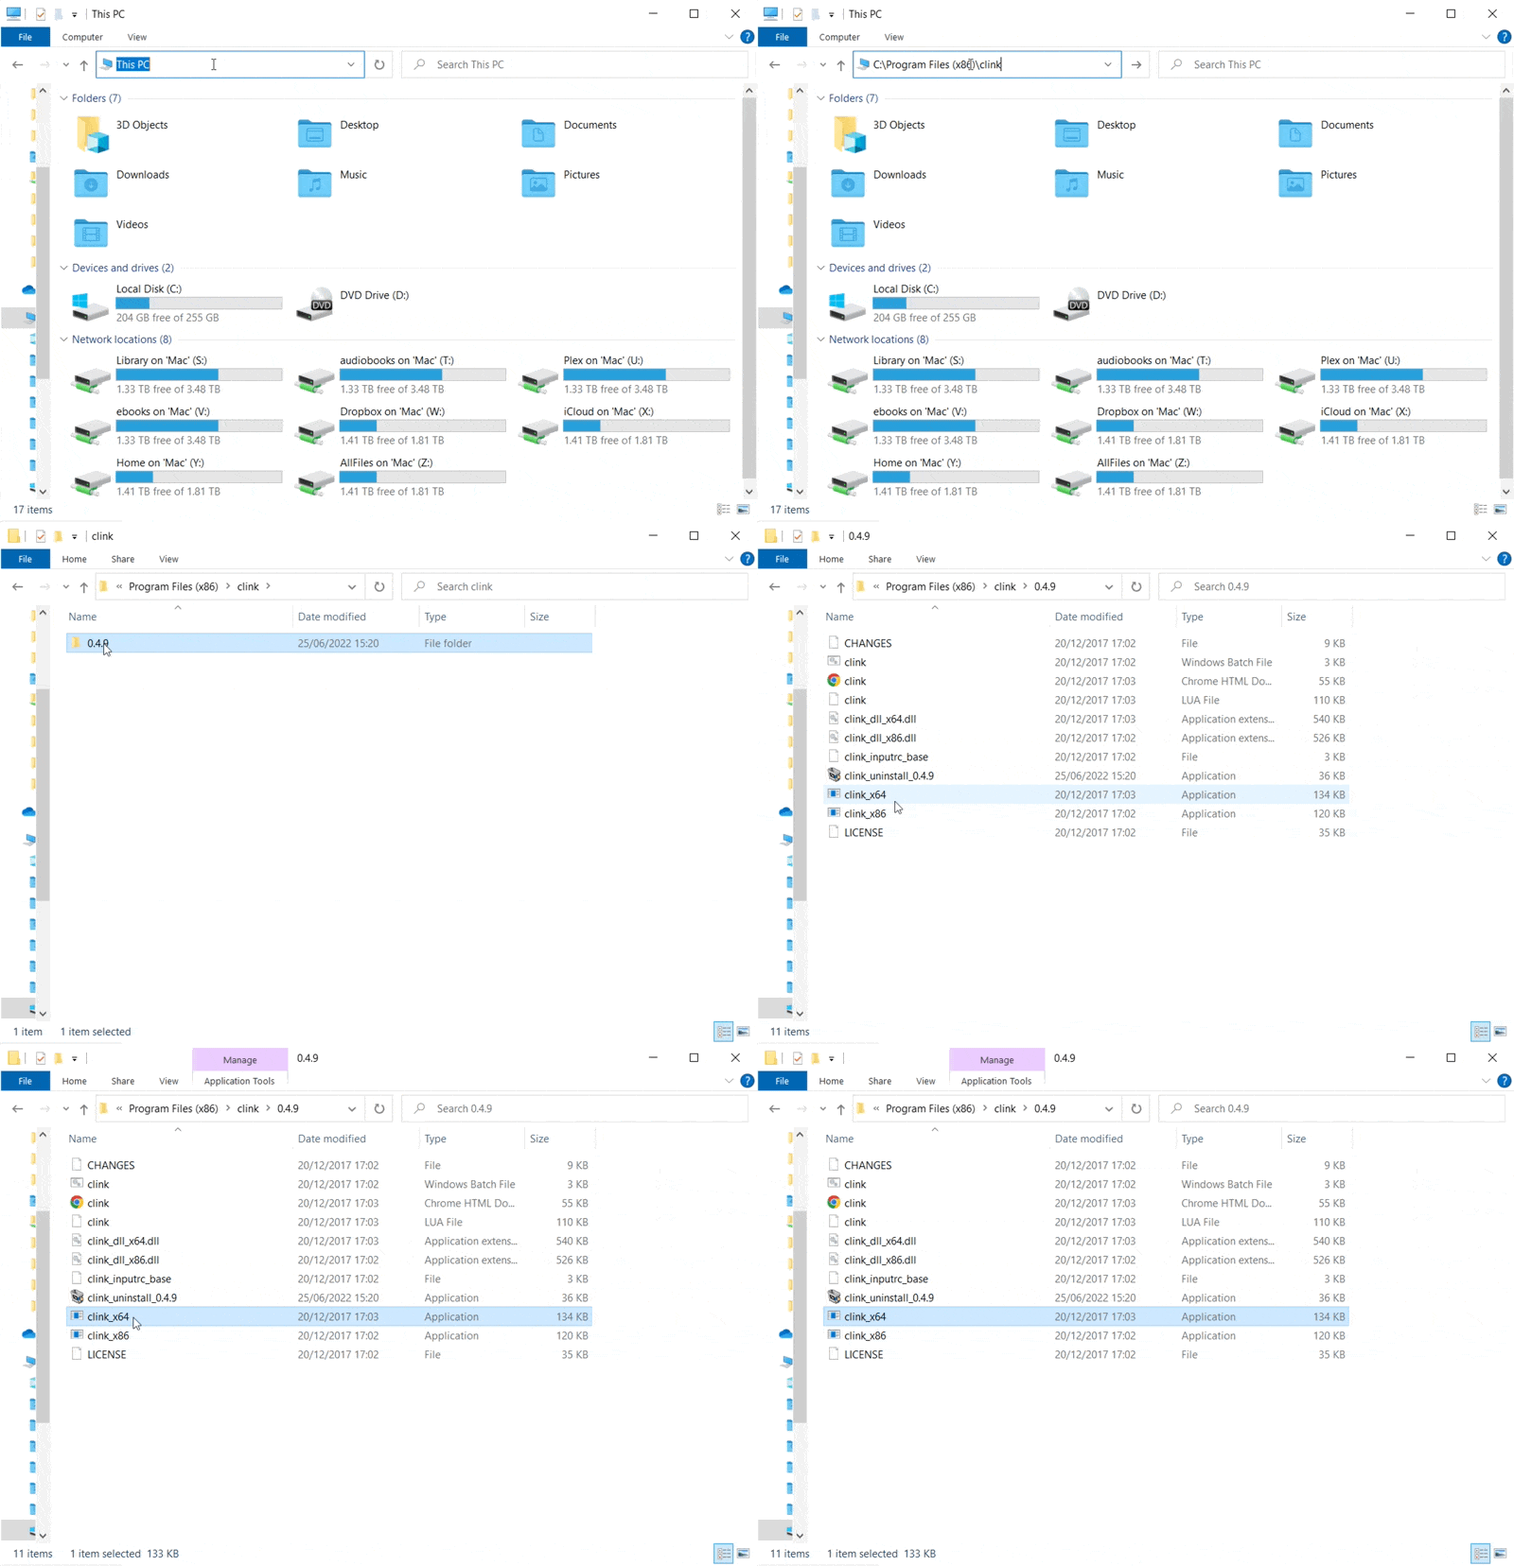
Browsing through folders
Before we continue, let me expand on what “C:Program Files (x86)clink” means.
When you install any app on your computer, it saves it somewhere on your computer, in our case, that somewhere is “C:Program Files (x86)clink.” The first folder is “C:” (your main computer drive). Inside that we have the next folder “Program Files (x86)”; inside it we have “clink.”
To navigate to our final folder (clink), you open Windows Explorer, open C:, then Program Files (x86), then click — the short way we represent the path to the final directory is “C:Program Files (x86)clink.”
Let’s move on.
With the install complete, go into the folder you installed click. Mine is C:Program Files (x86)clink, go into the version folder 0.4.9. Here’s how I get to my folder,
Add Clink command-line to VS Code
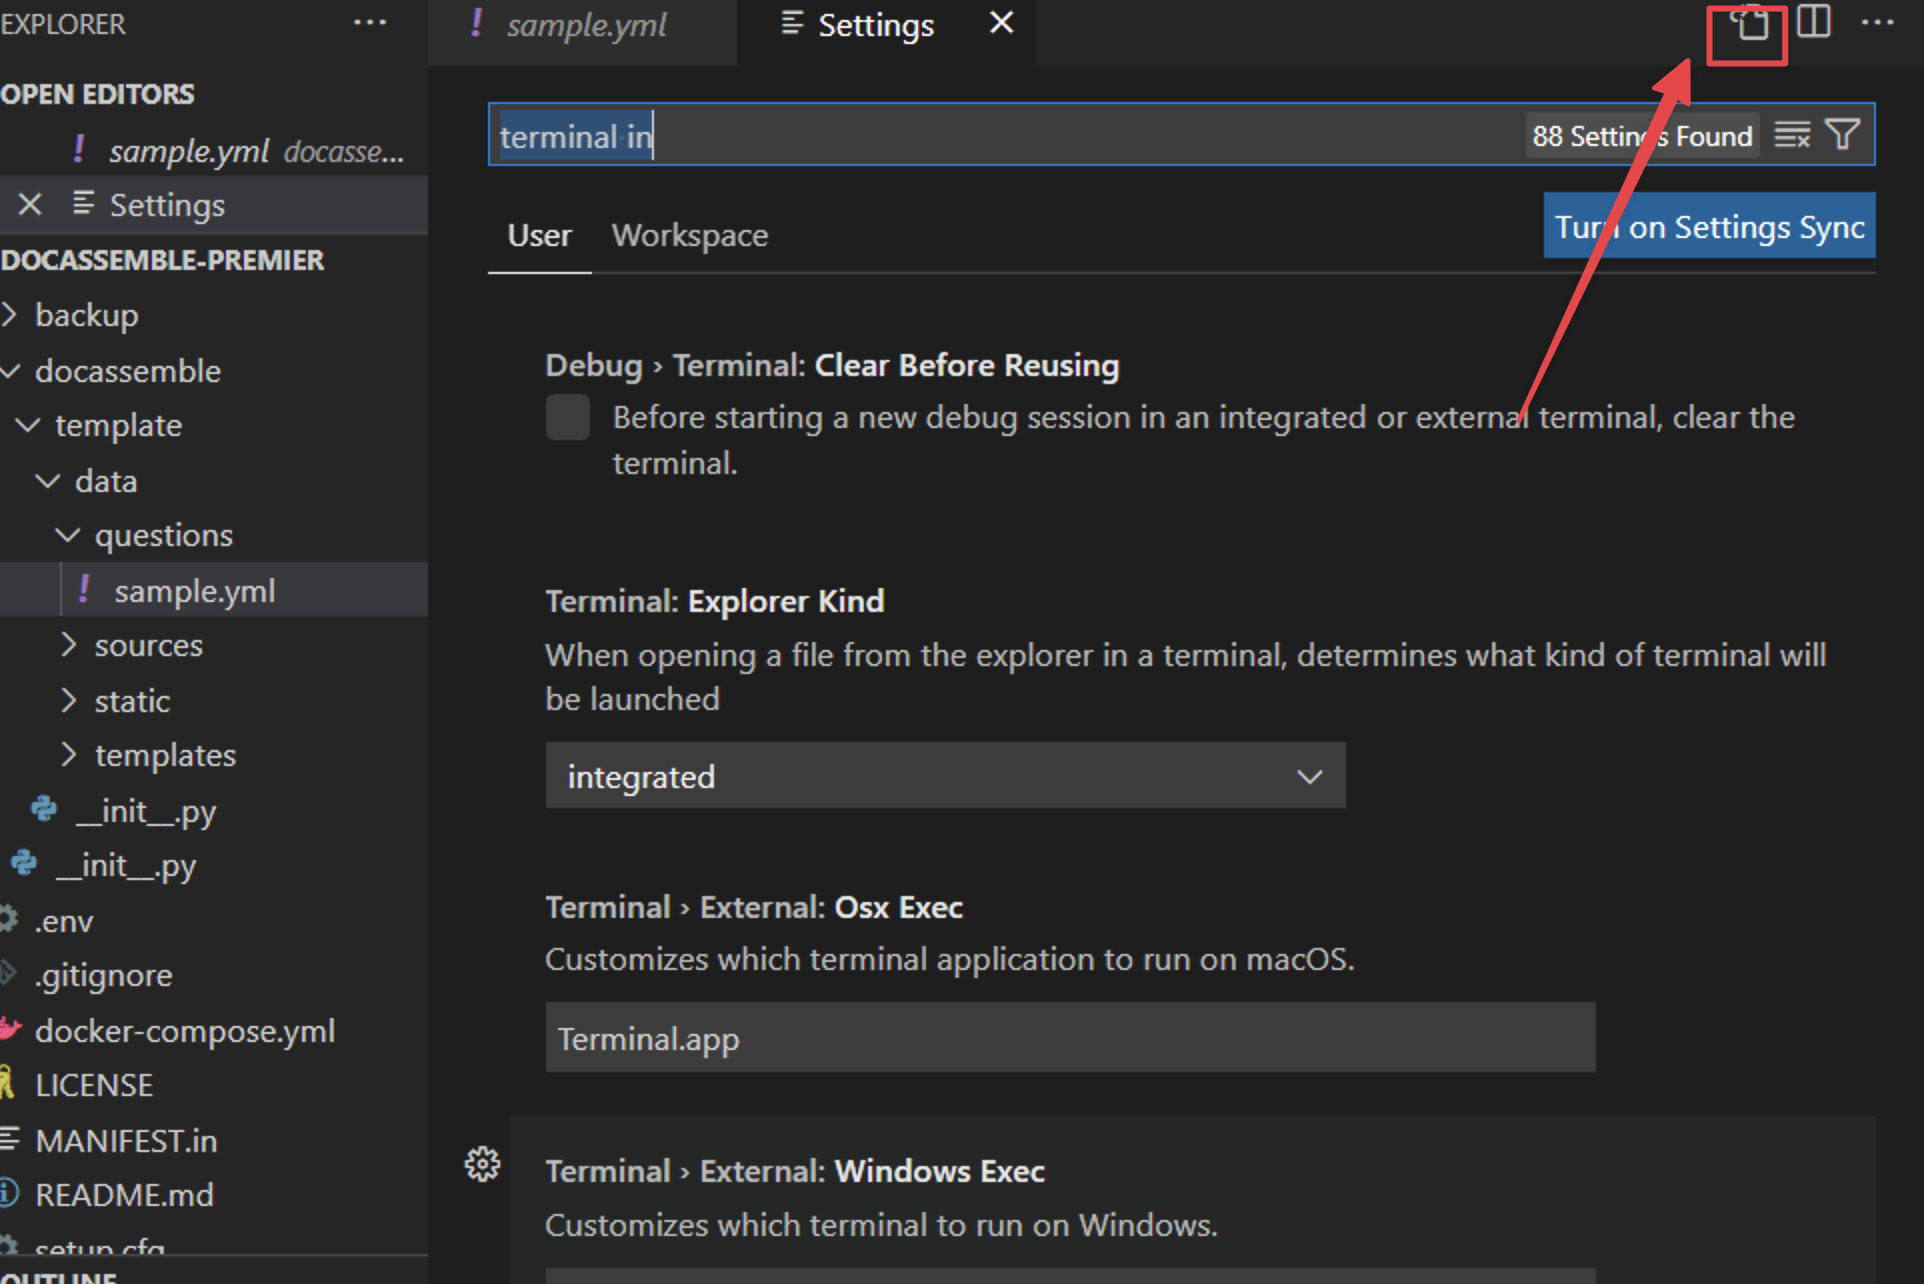
Let’s open VS Code. Click File > Preferences > Settings.
Click on the settings icon
Add the text below within the “{ }” section
"terminal.integrated.shell.windows": "C:\Windows\System32\cmd.exe","terminal.integrated.shellArgs.windows": ["/K", "C:\Program Files (x86)\clink\0.4.9\clink_x64.exe"," inject"]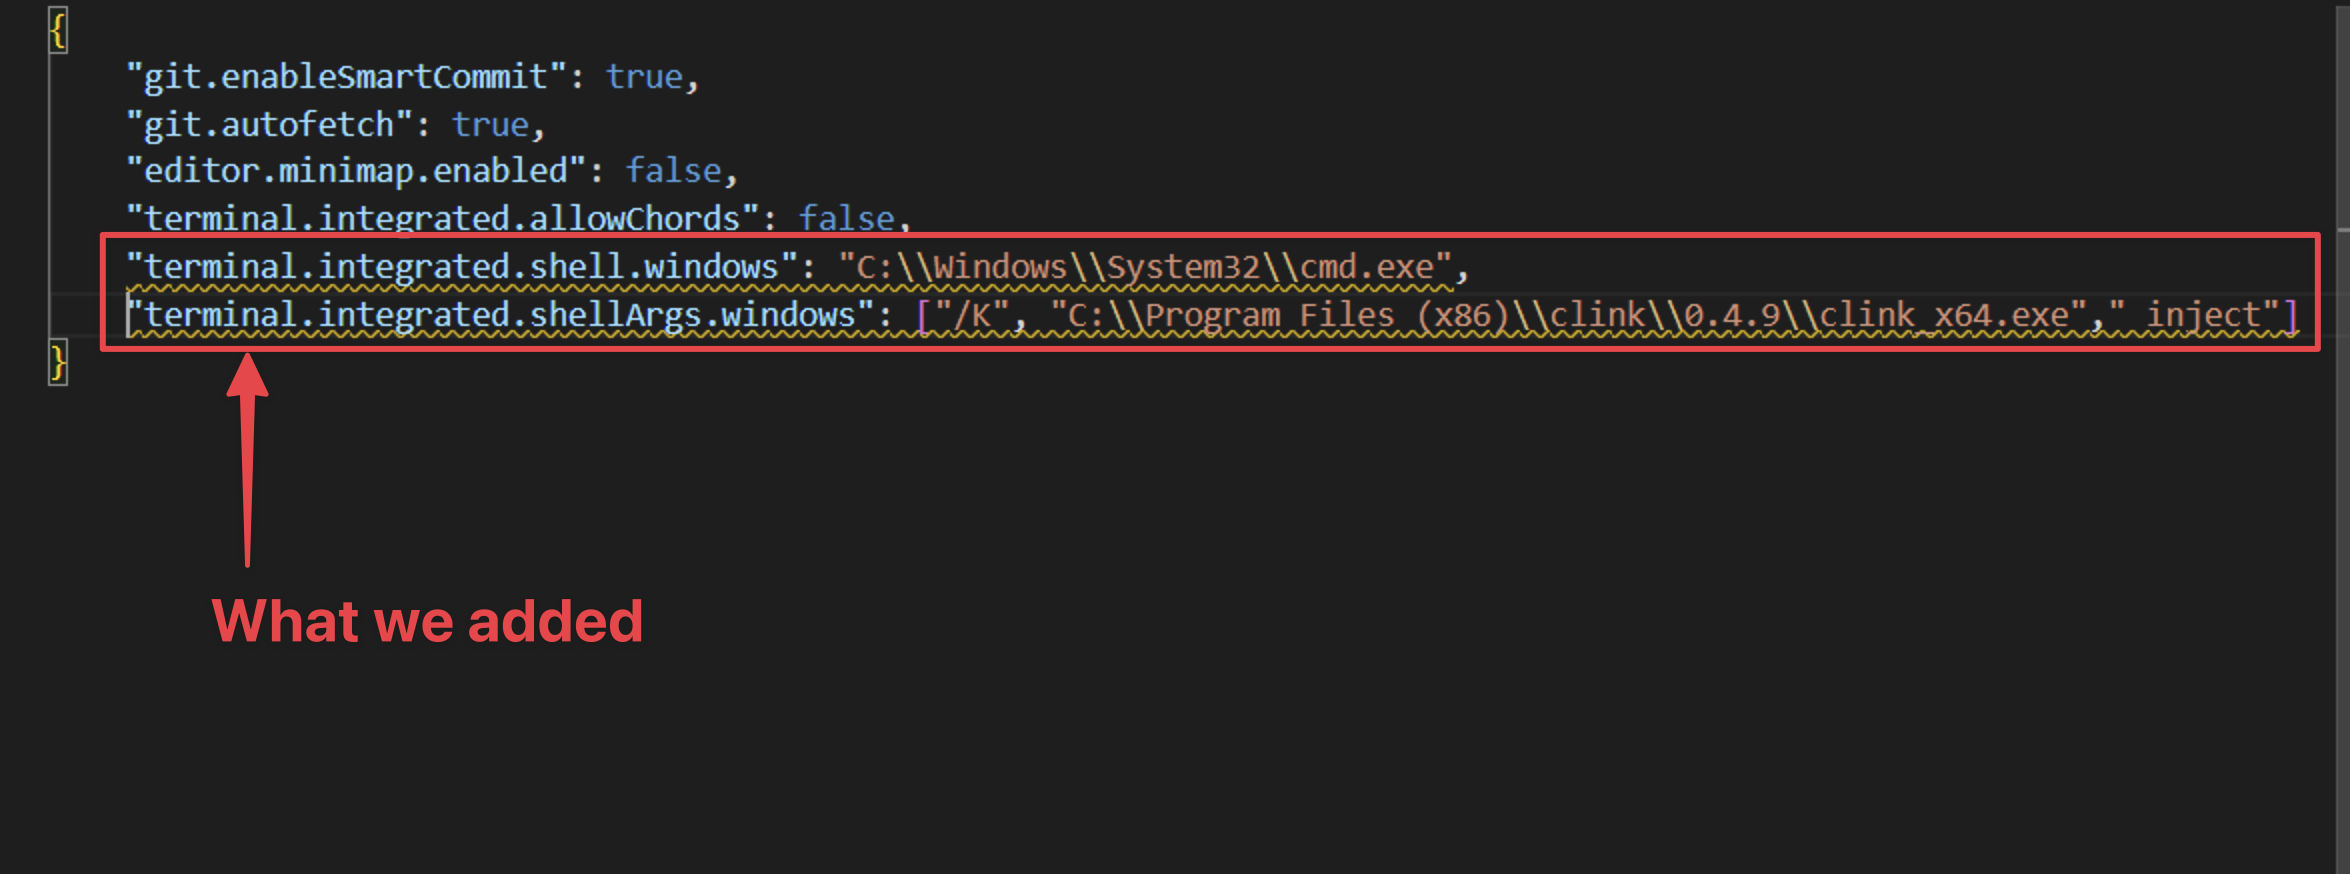
(Note that the path in terminal.integrated.shellArgs.windows
In the Search settings box, enter terminal and in the Terminal: Explorer Kind select integrated
To confirm this is working as expected, open the terminal. Click Terminal > New Terminal
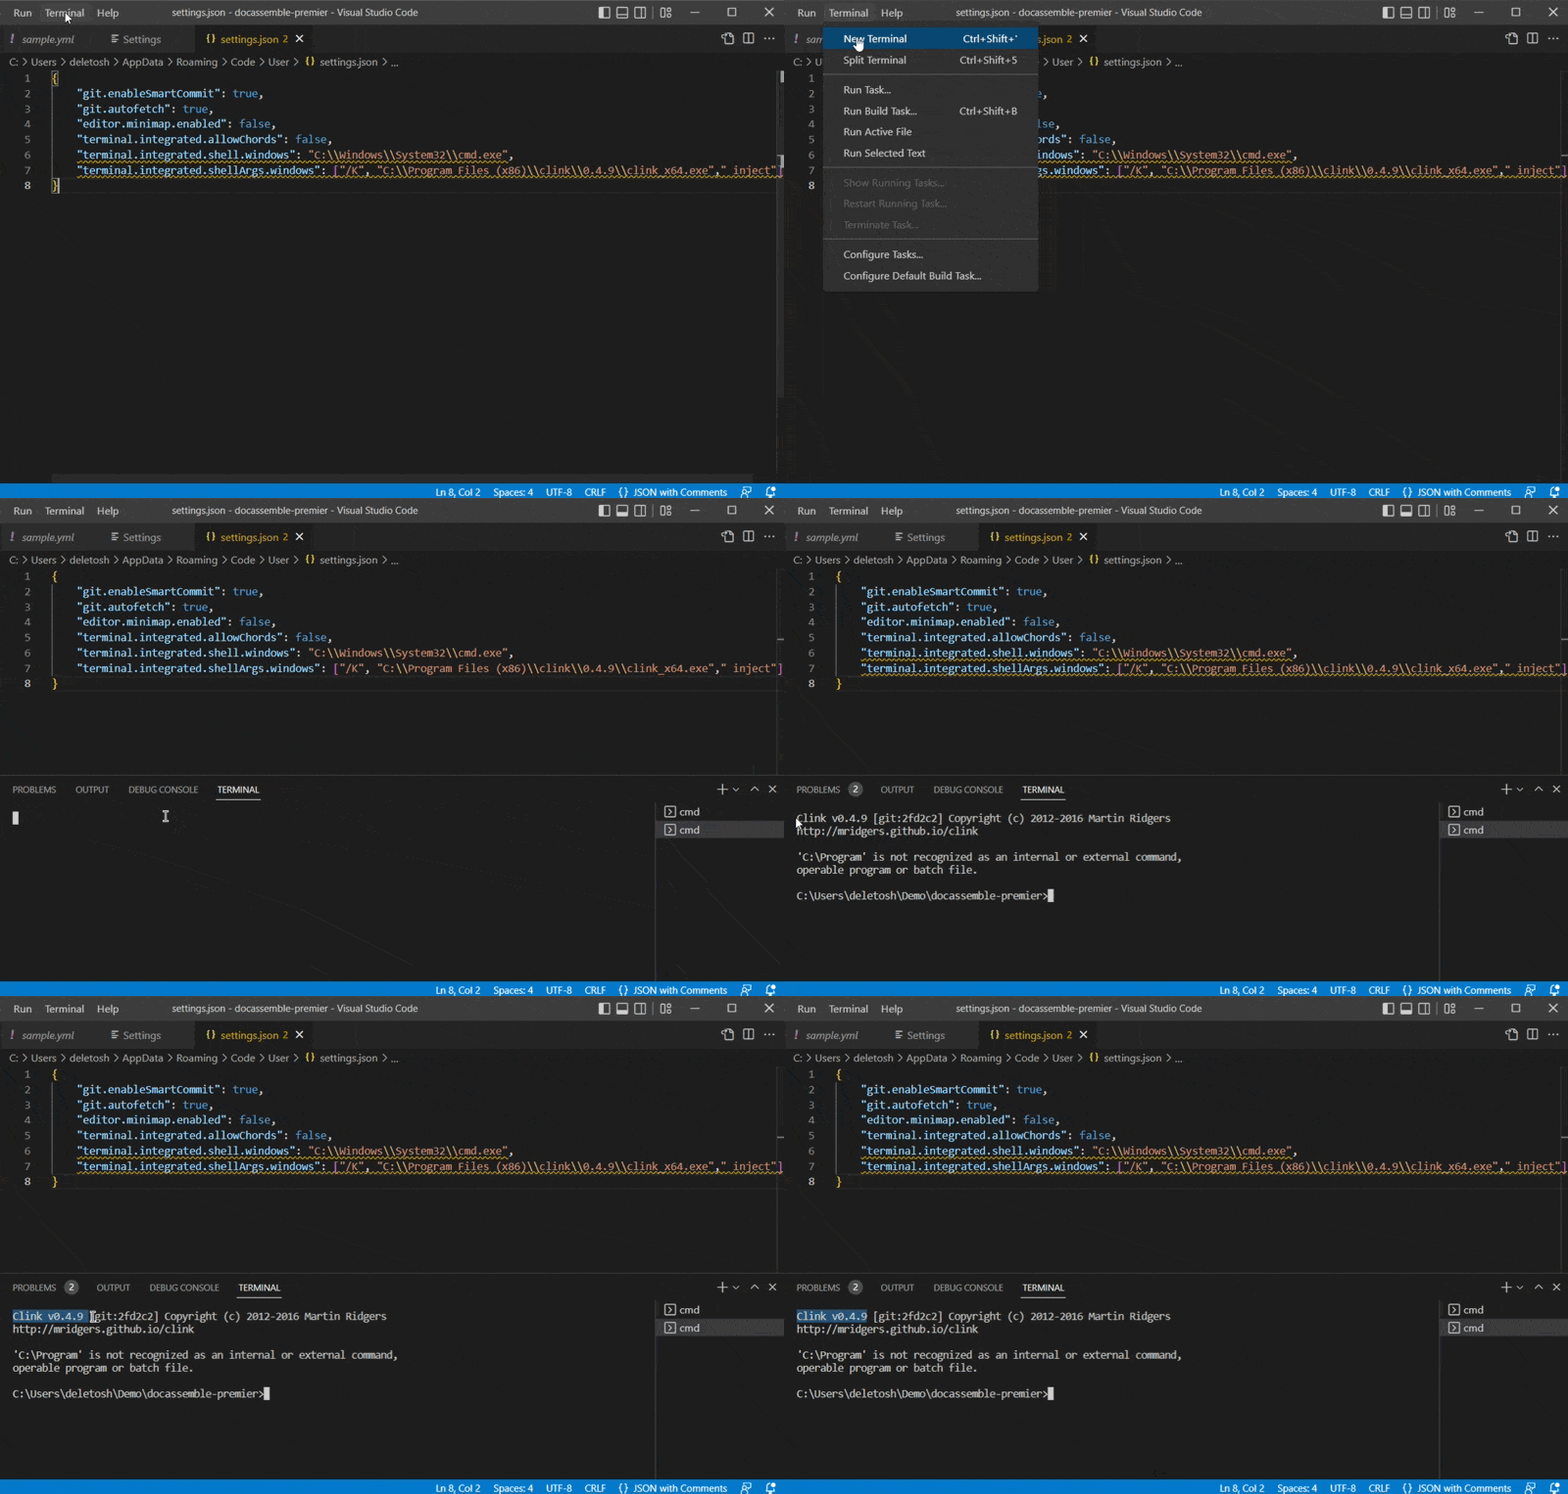
We should see Clink v0.4.9.
Install Python and docassemble command-line app
Next, we will install python.
Python is a programming language, and that’s docassemble’s parent language. To make docassemble work properly offline, we need to install on our system.
Go to https://www.python.org/downloads/windows/, Click the most recent version and download.
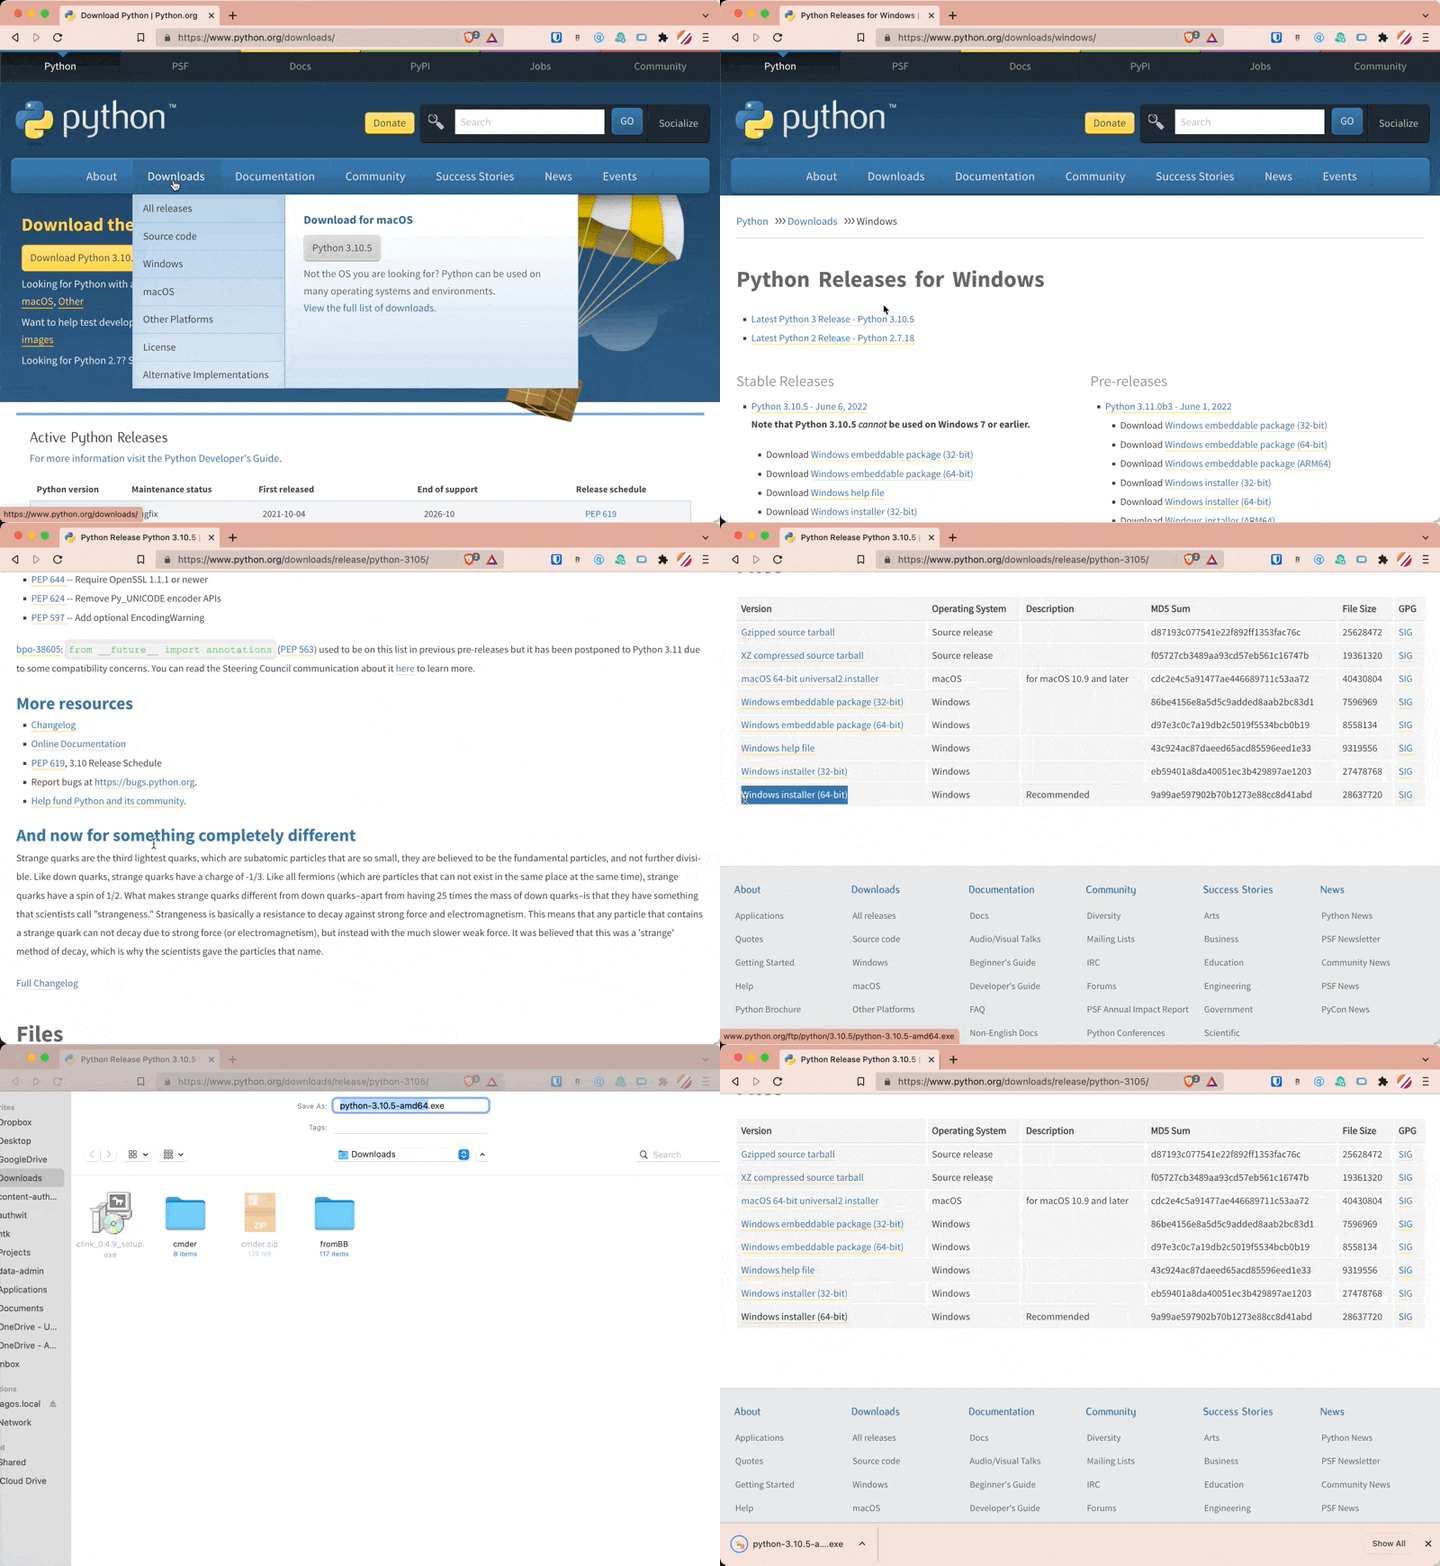
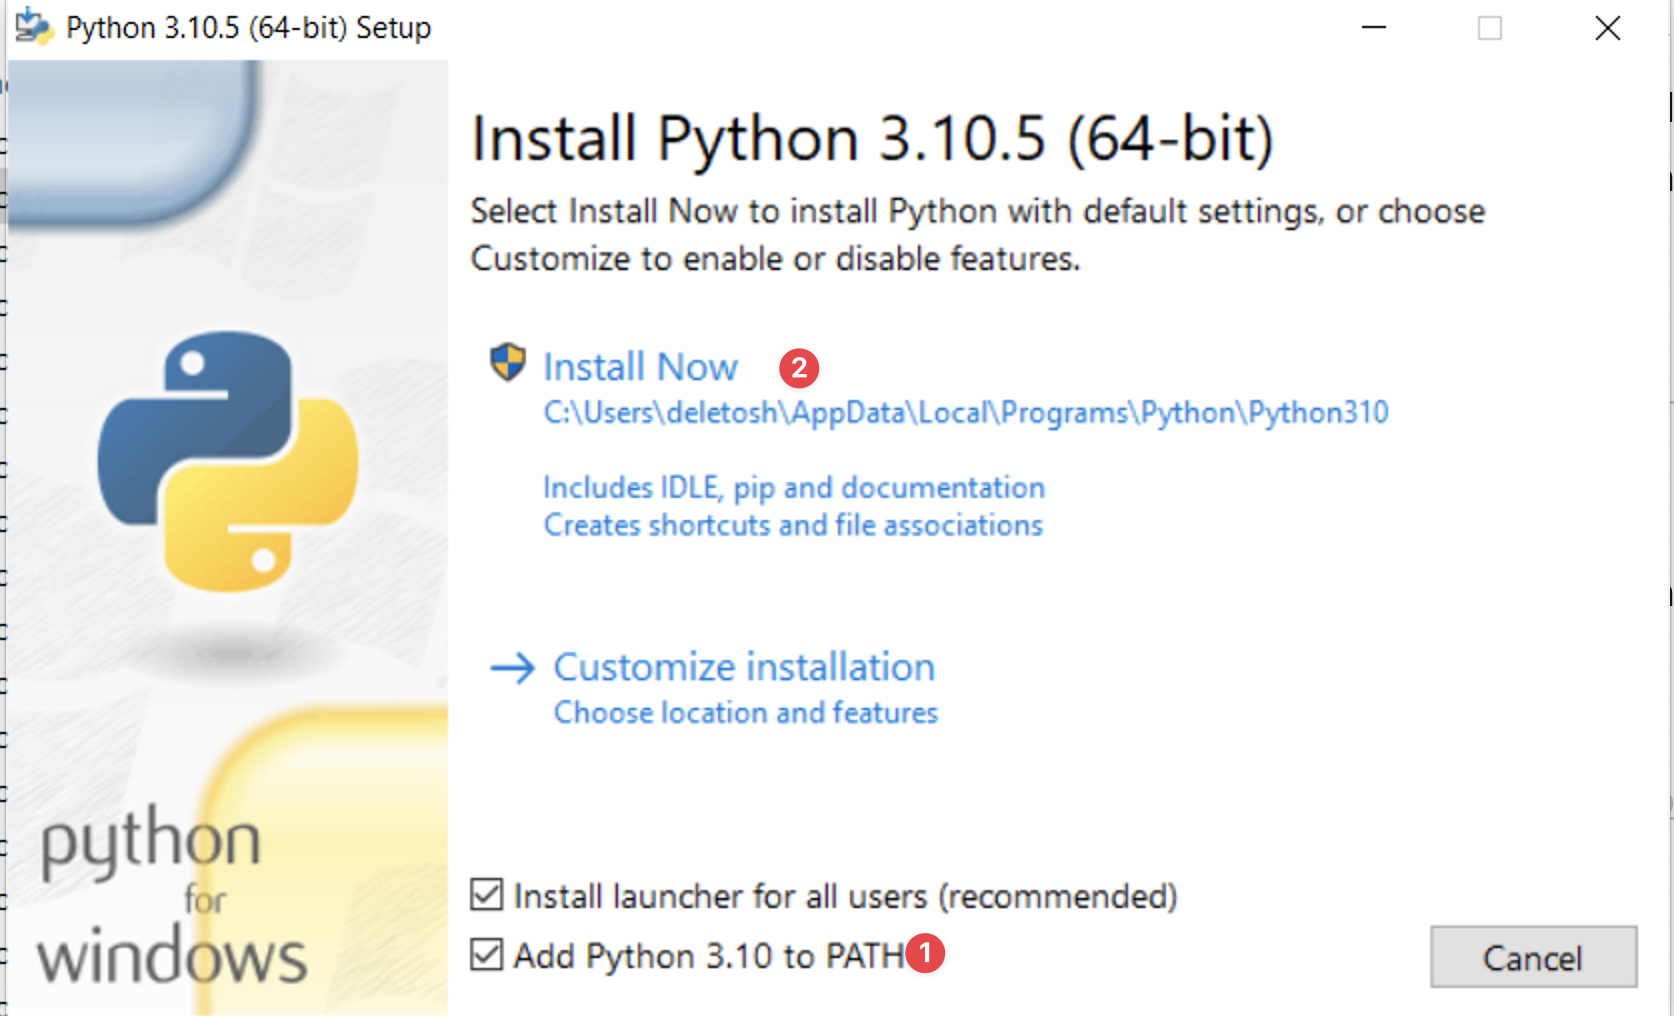
Open the downloaded file. Before starting the installation, check the box Add Python 3.x to PATH, click Install Now
When your installation is complete, open VS Code and a new terminal then type python, it should look like this:
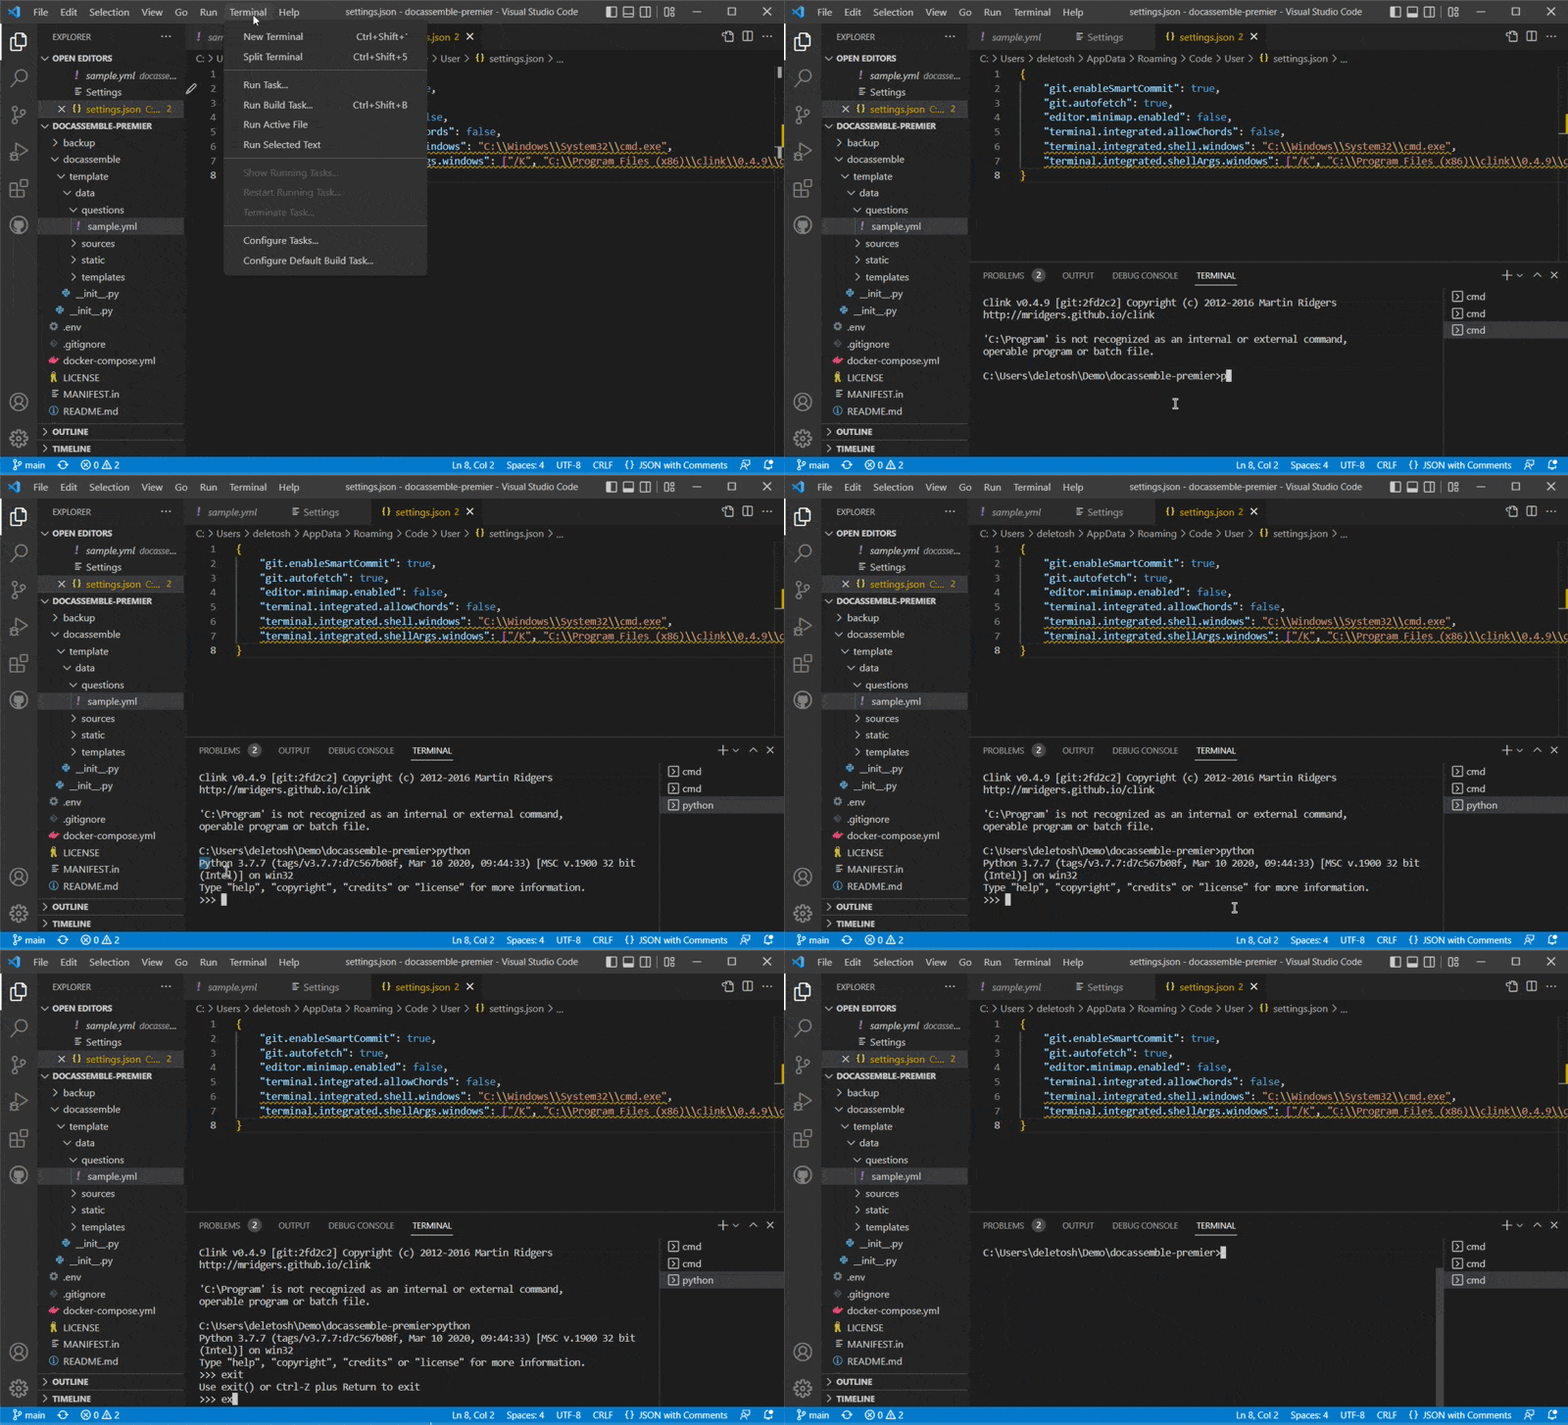
If you see a message like the above, we’re good.
We’re now ready for the final step.
Install docassemble command-line tool (docassemblecli)
With python installed, let’s install the tool that let’s run docassemble locally.
Open VS Code, click Terminal > New Terminal in the terminal enter pip install docassemblecli
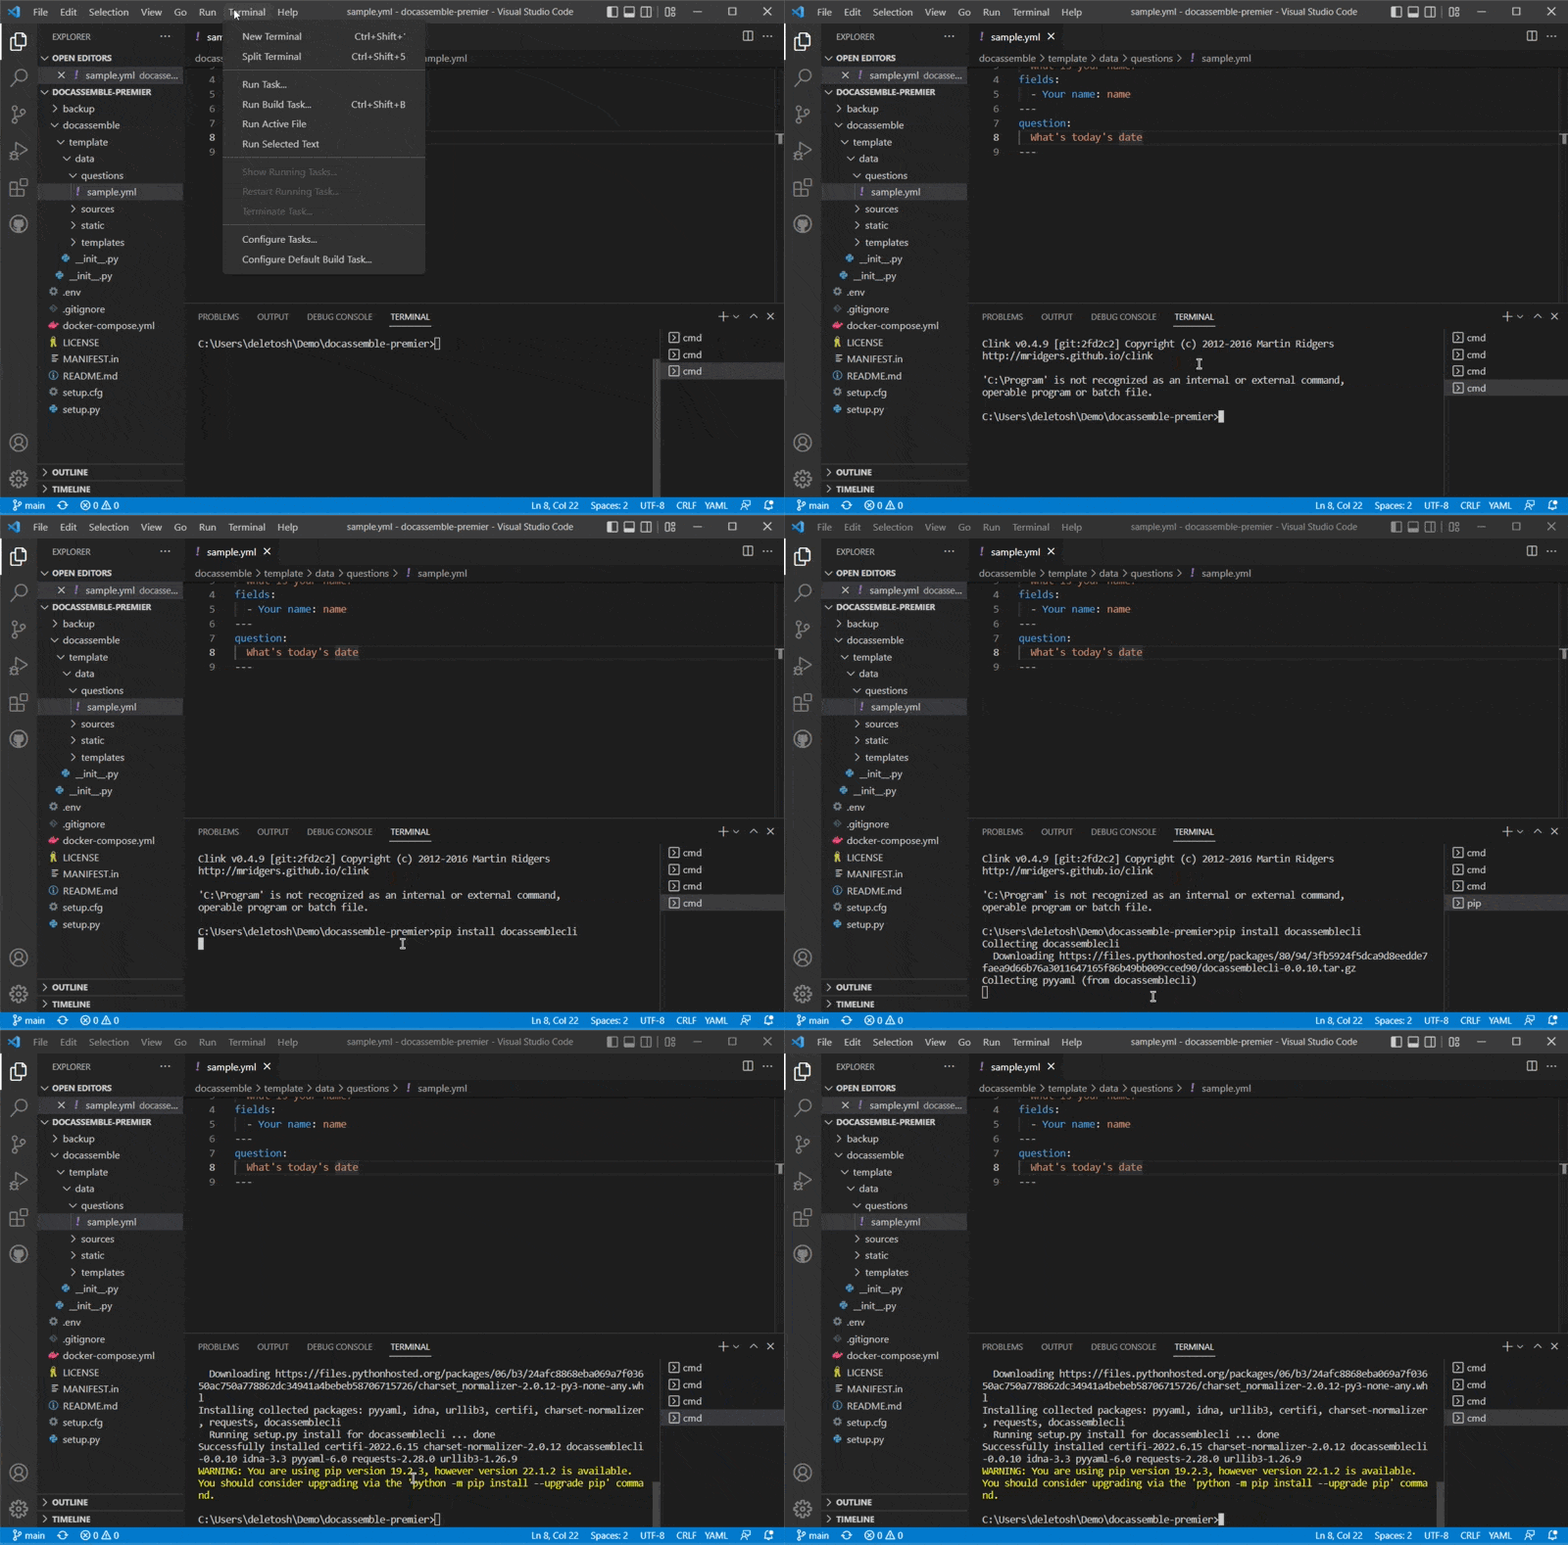
Let’s run everything together
In the terminal, type docker-compose up -d . This is the command that starts a virtual computer.
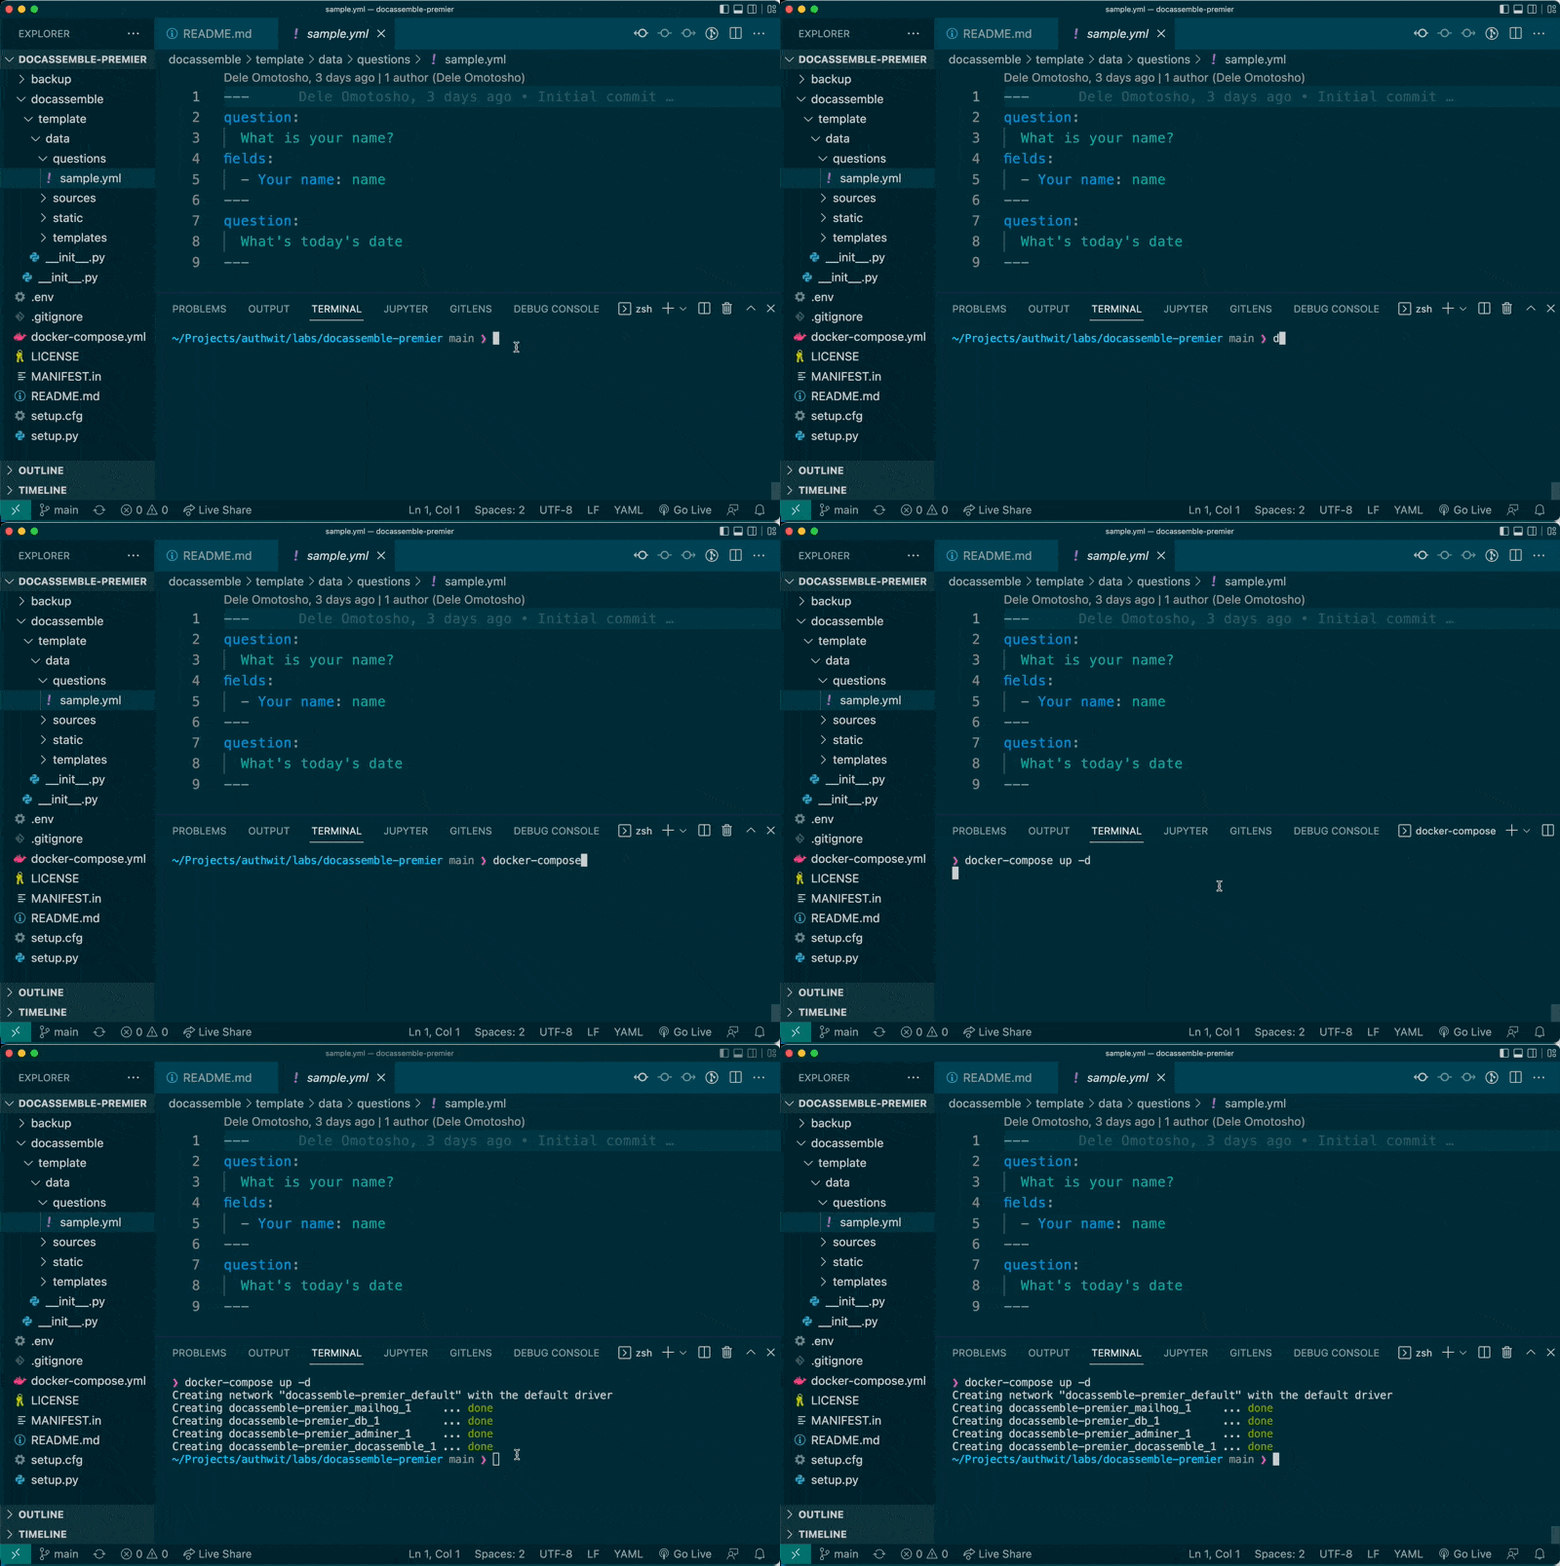
Open your browser and go to http://localhost. You might see this
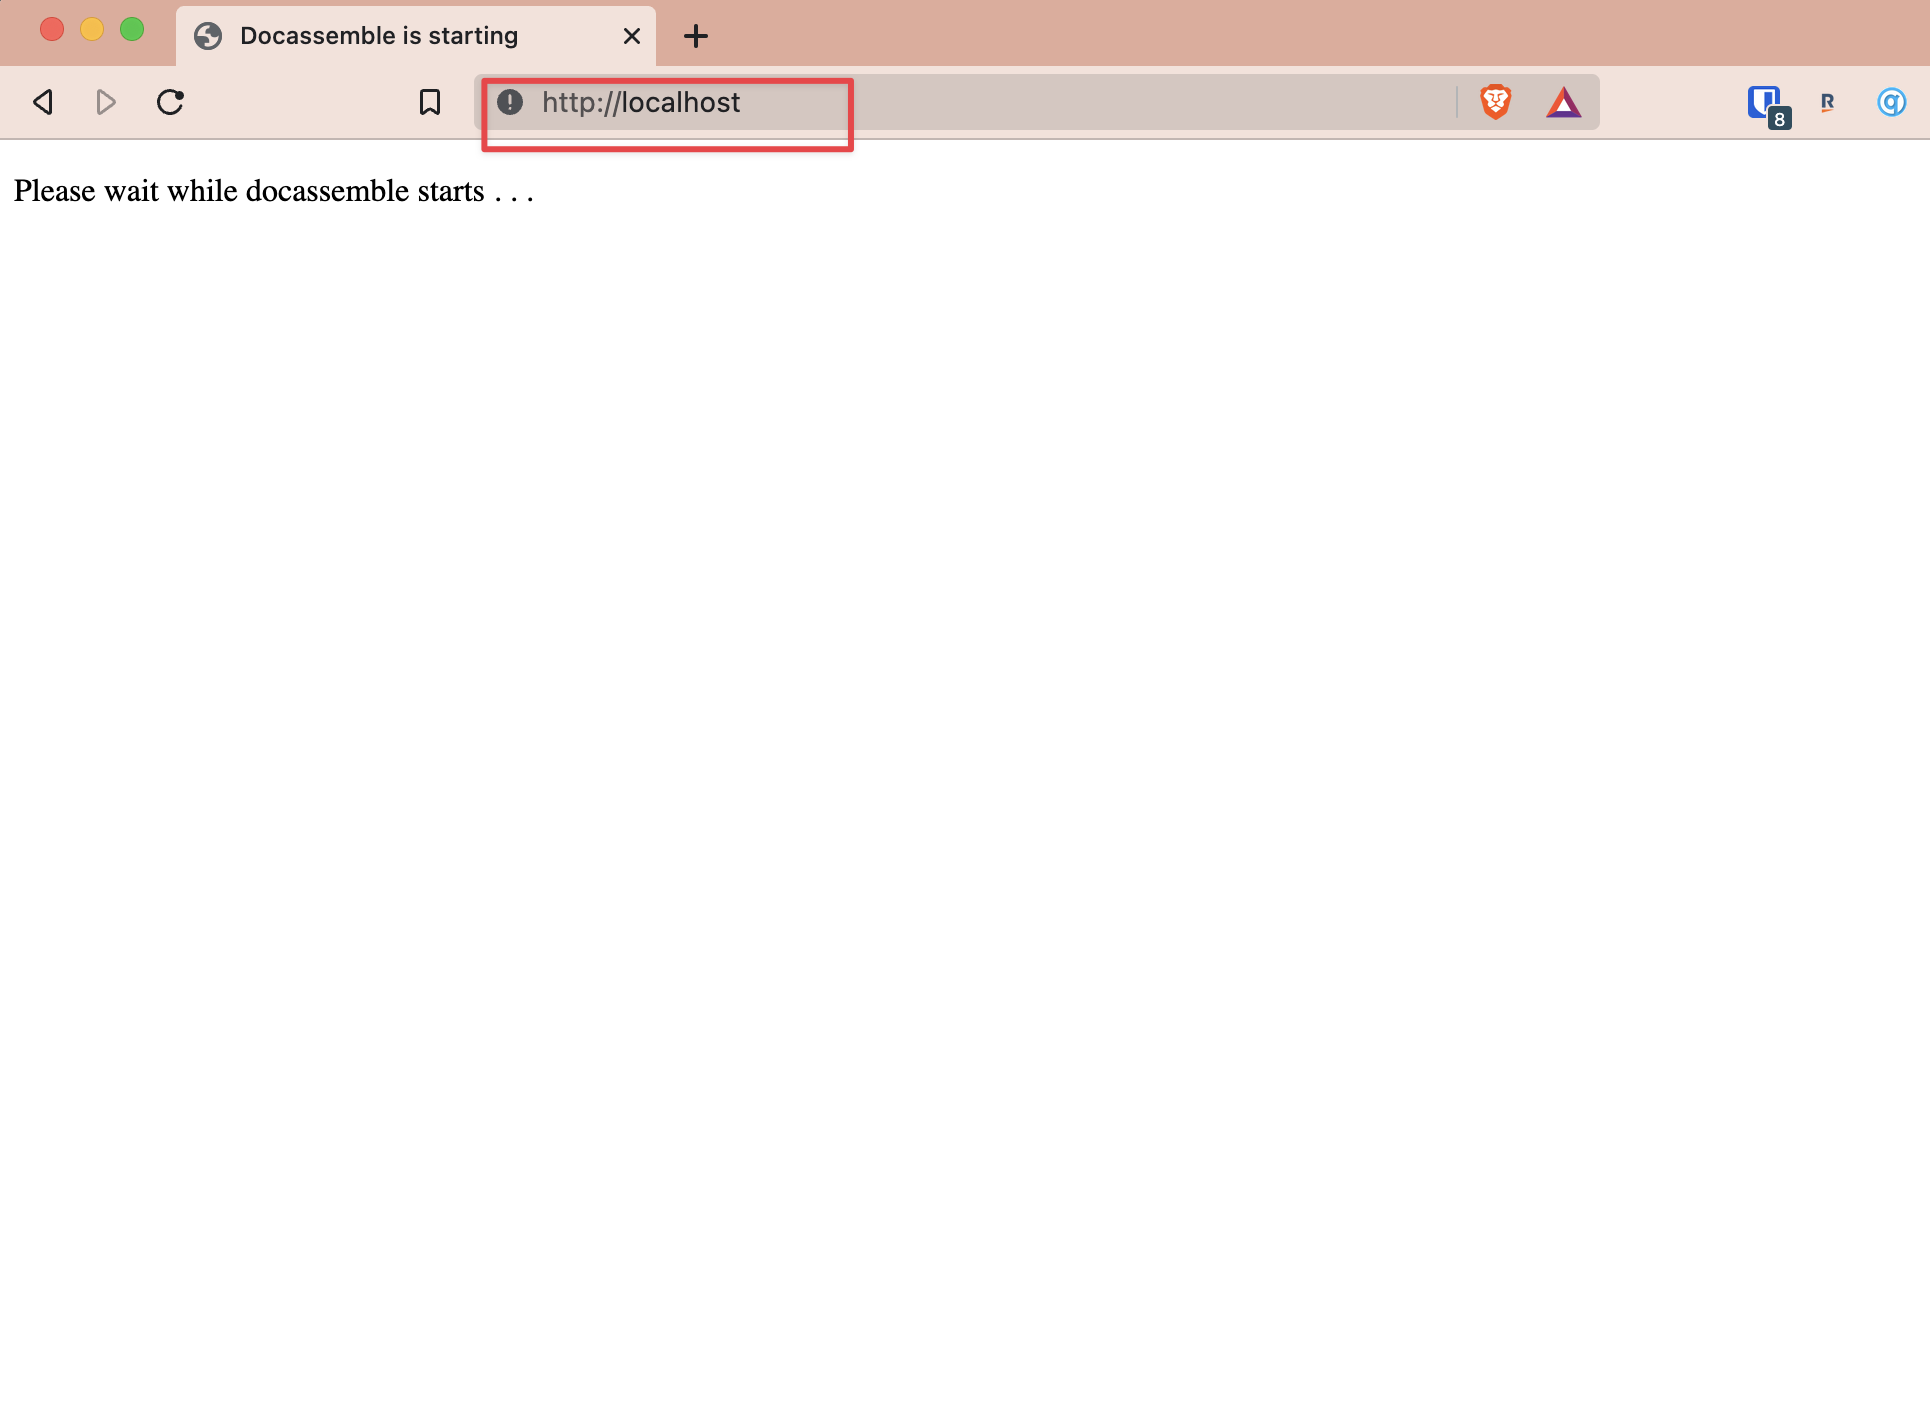
After a few minutes, you should see Docassemble running. Sign in with the default password:
- username: [email protected]
- password: password
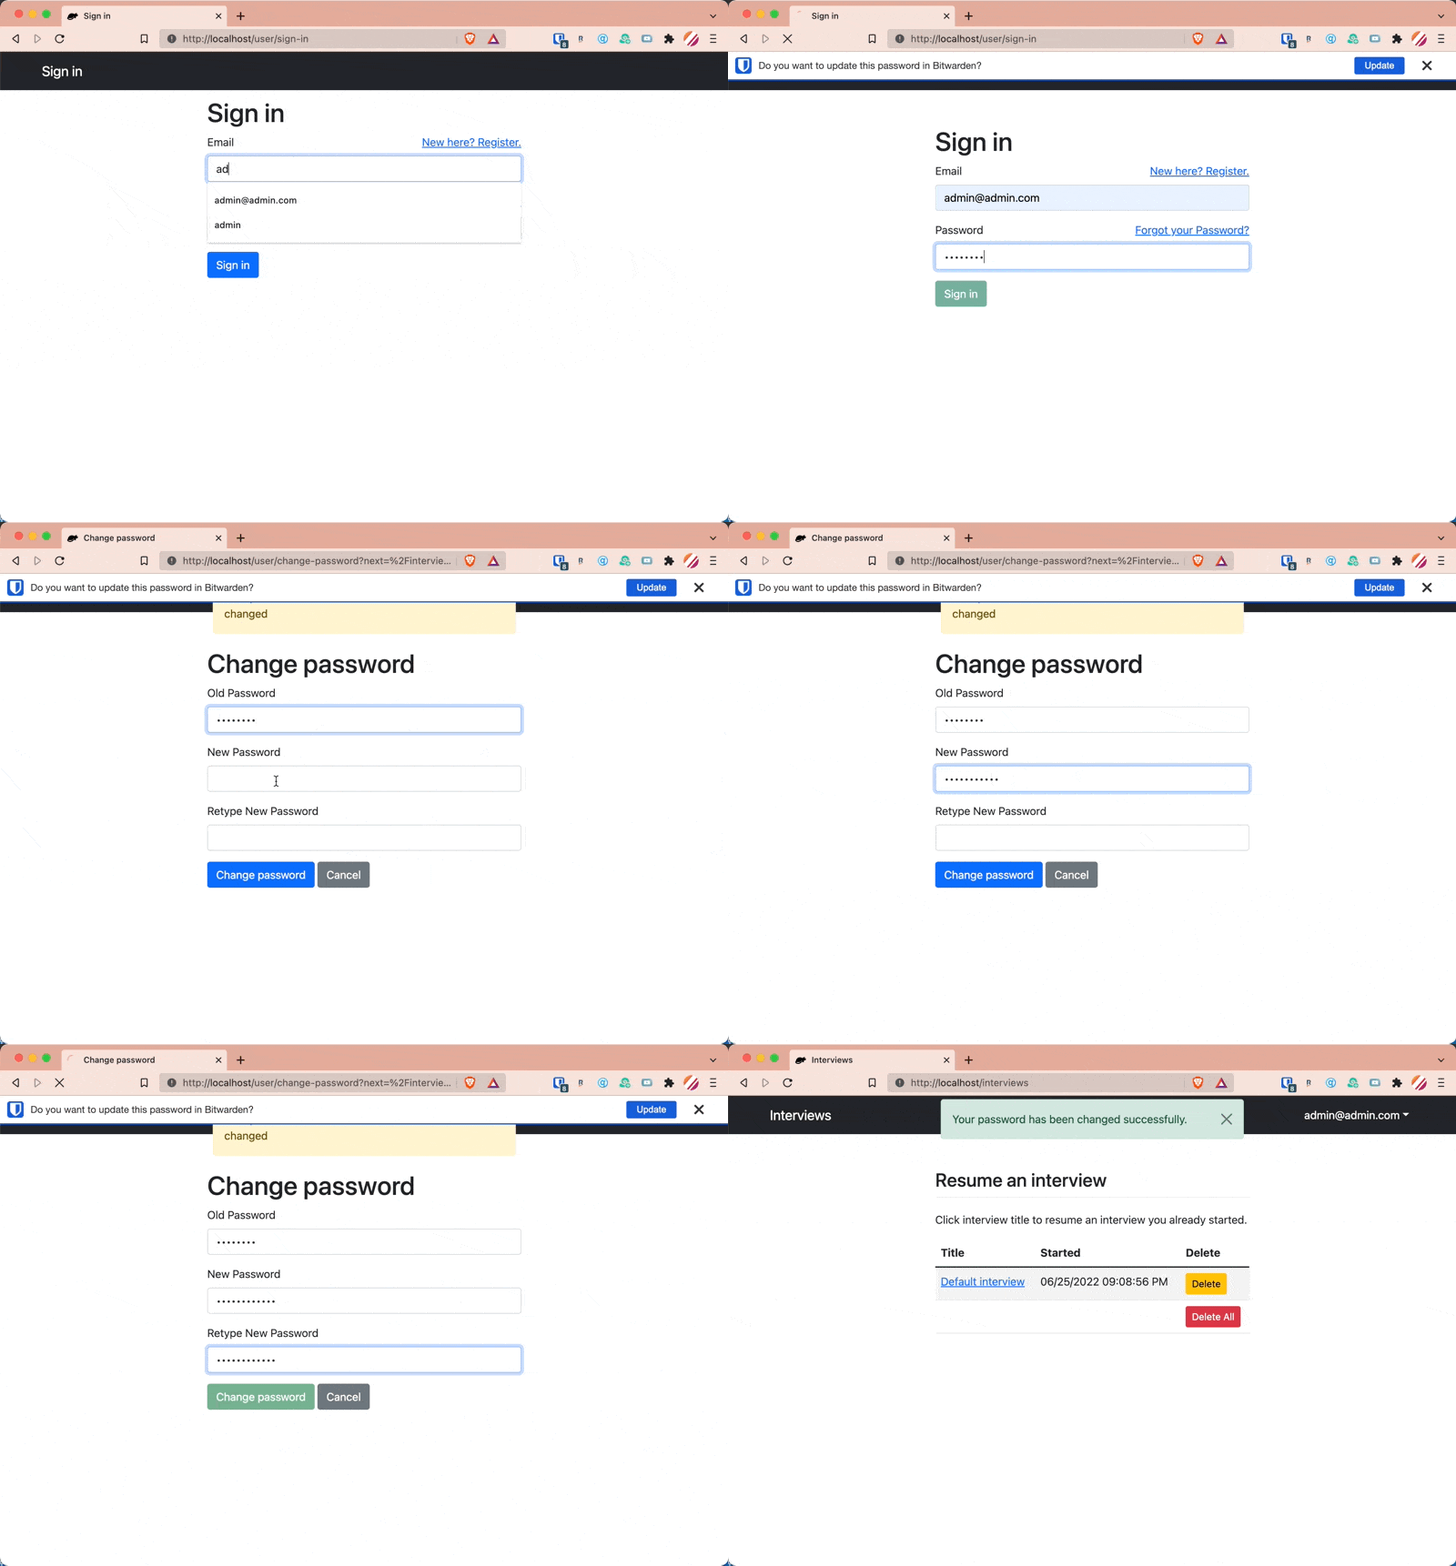
(the first time you login, it will have you change your password)
Run your first offline docassemble
Our main setup is now complete. Let’s test our first interview.
First, go to Docassemble running on your system. In your browser, type http://localhost, in the navigation section, click My Profile.
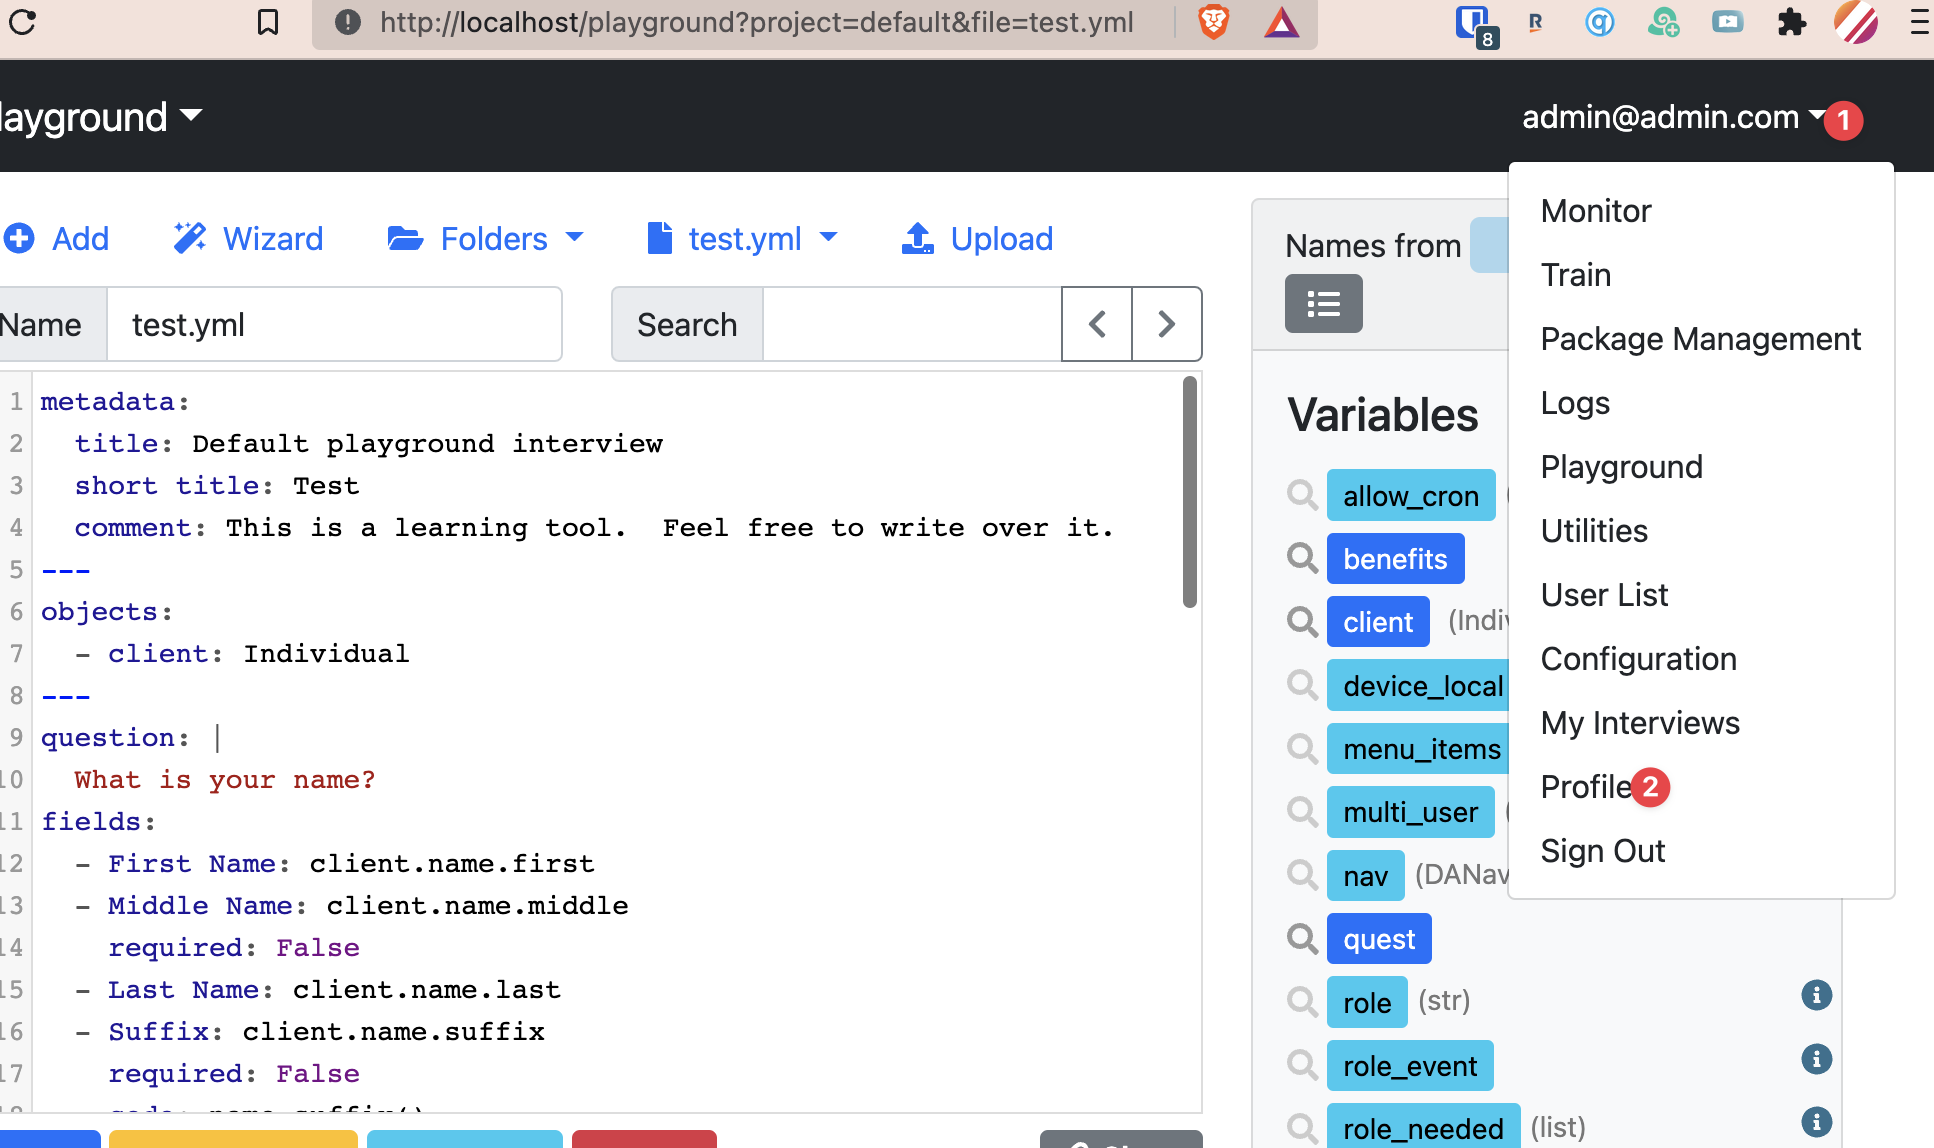
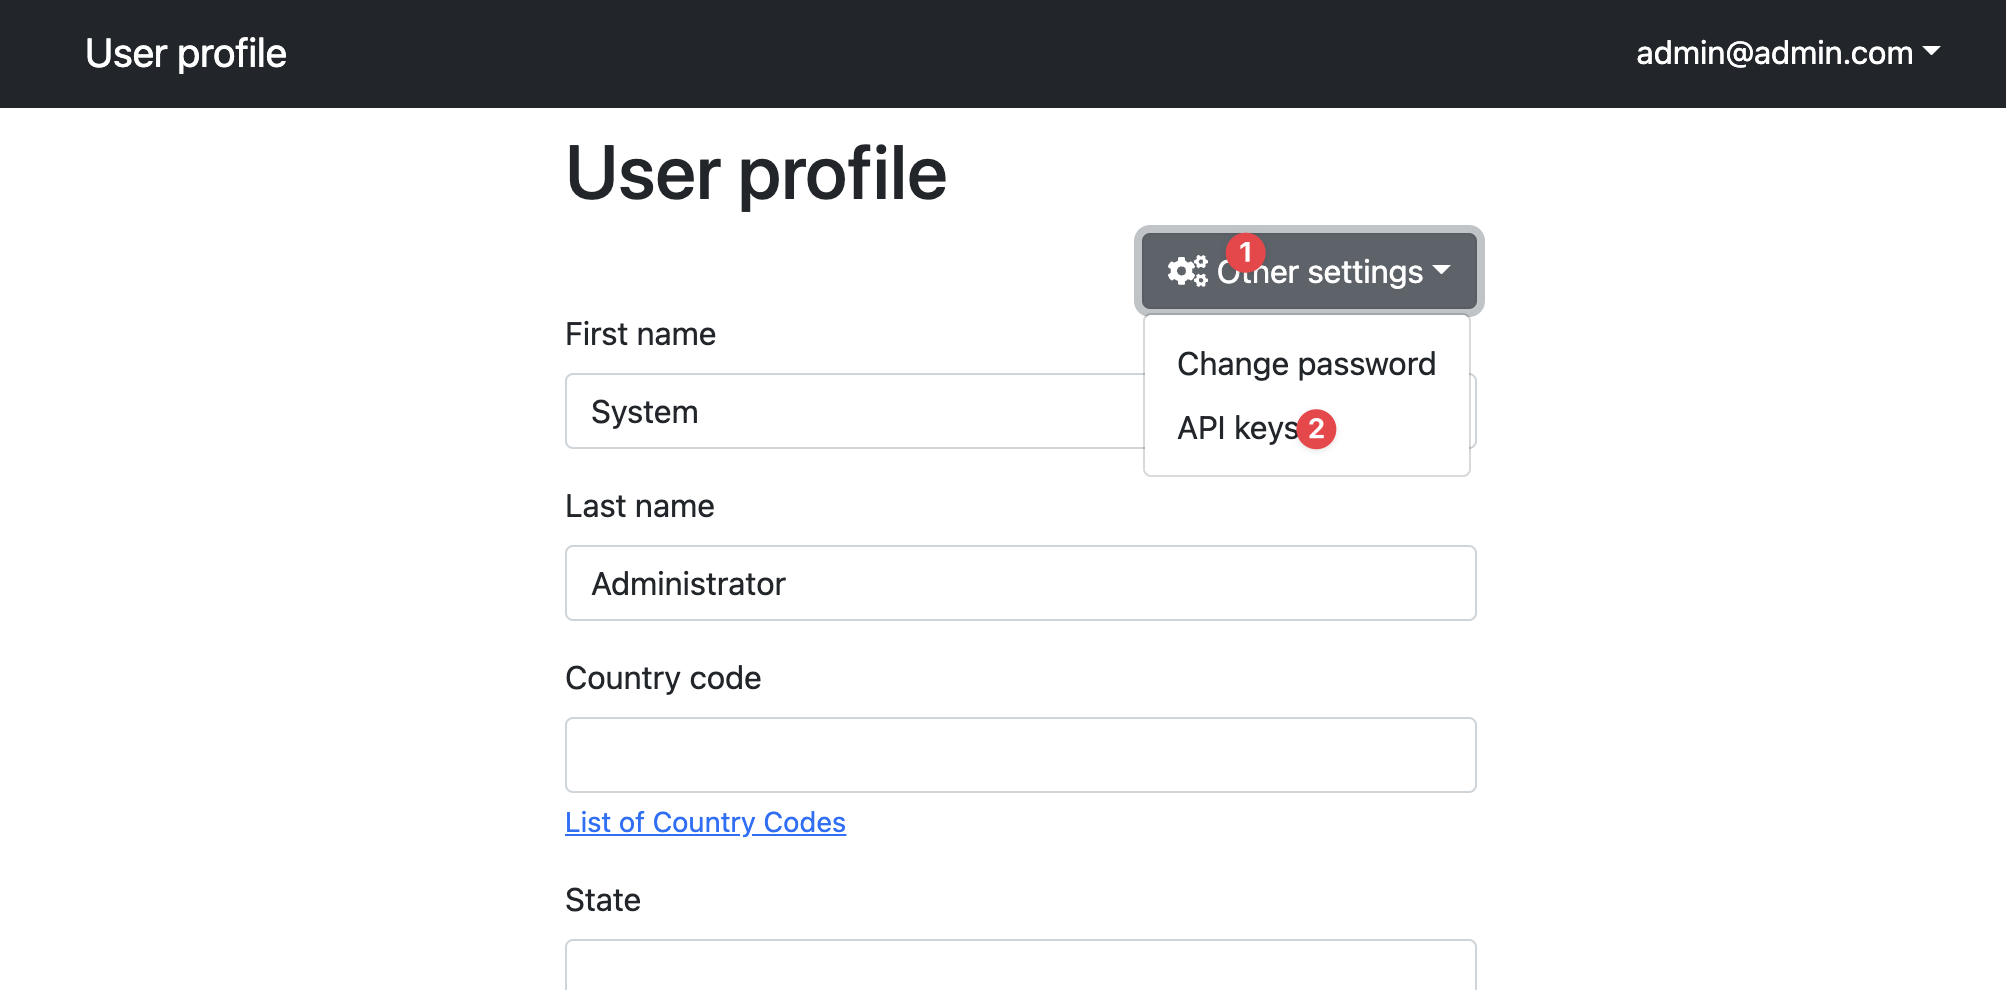
On the next page, go to the Other settings > API keys
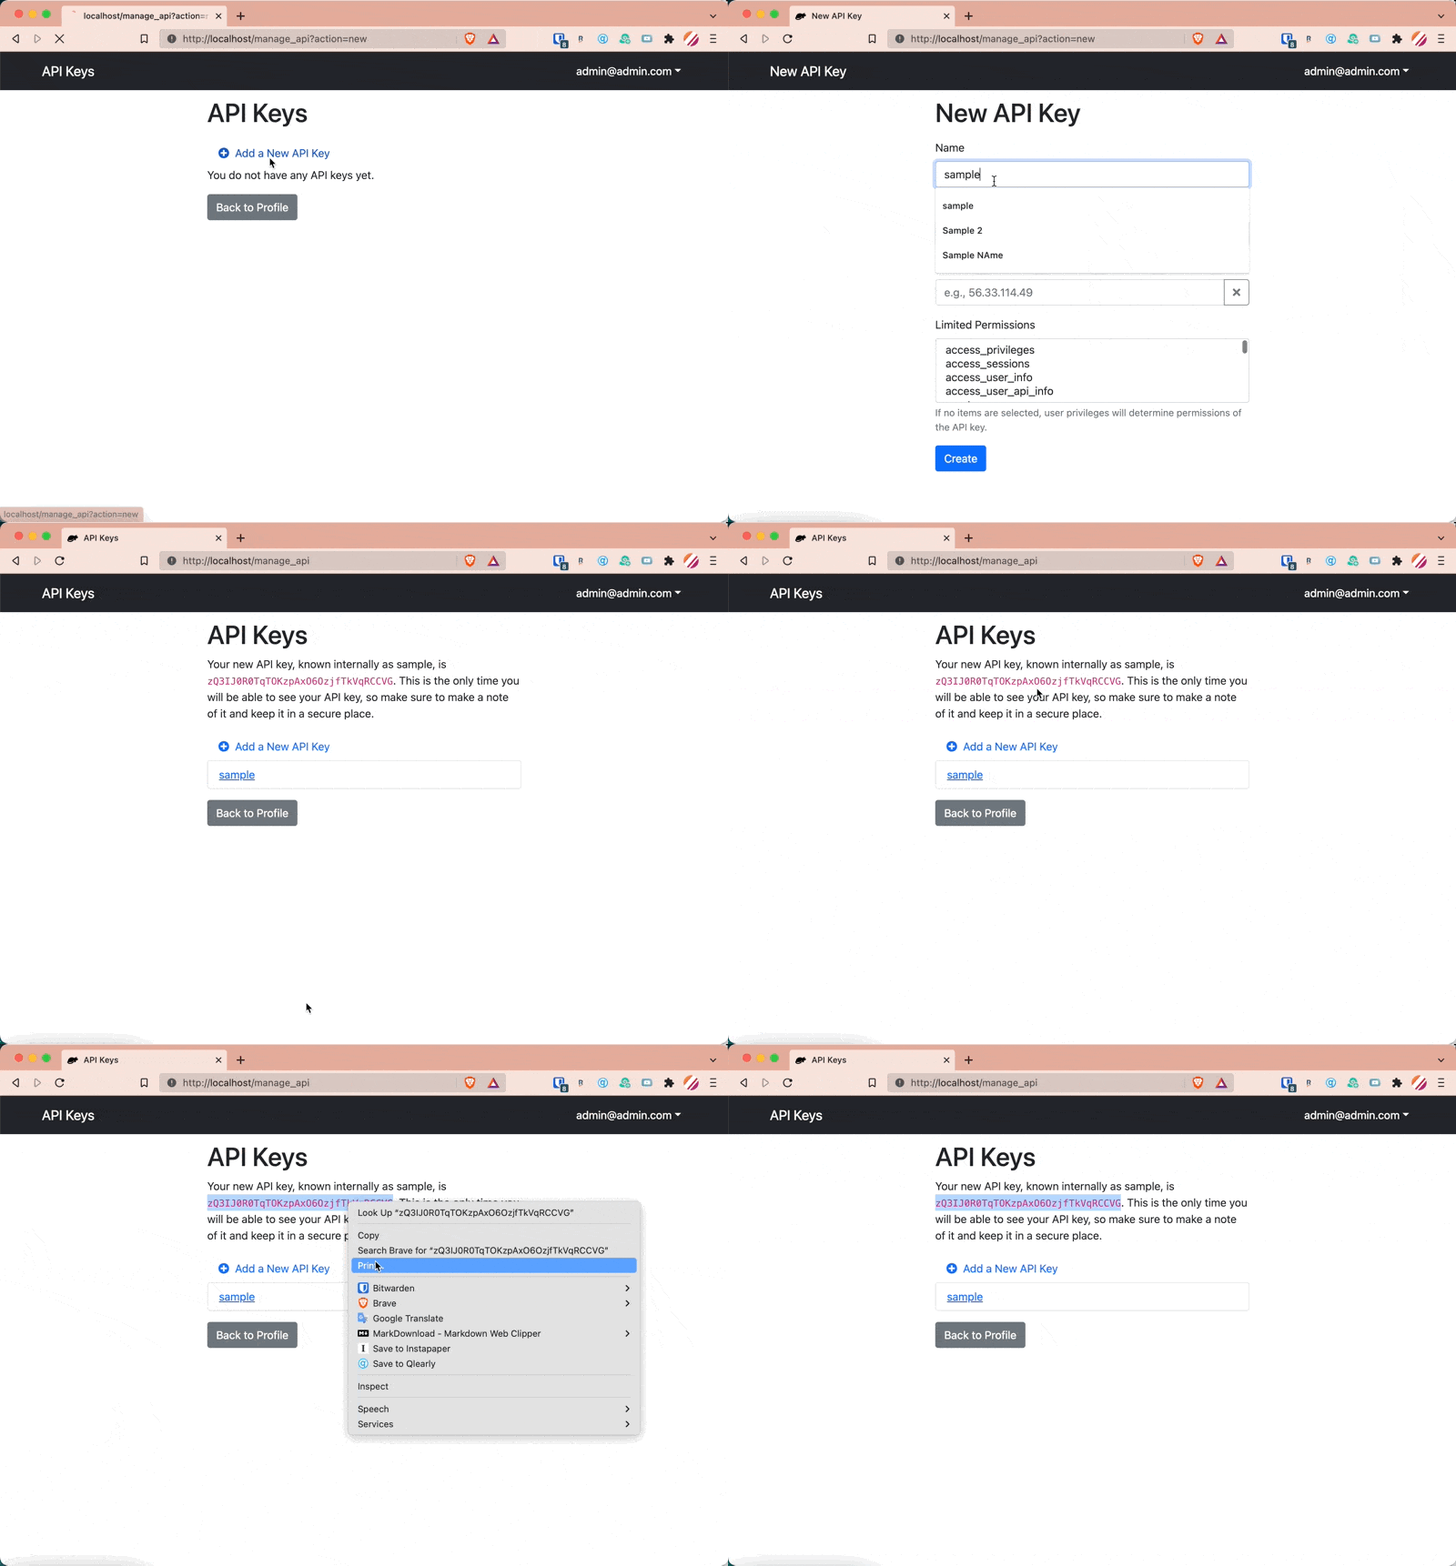
Click Add a New API Key and give it any name. Then click Create.
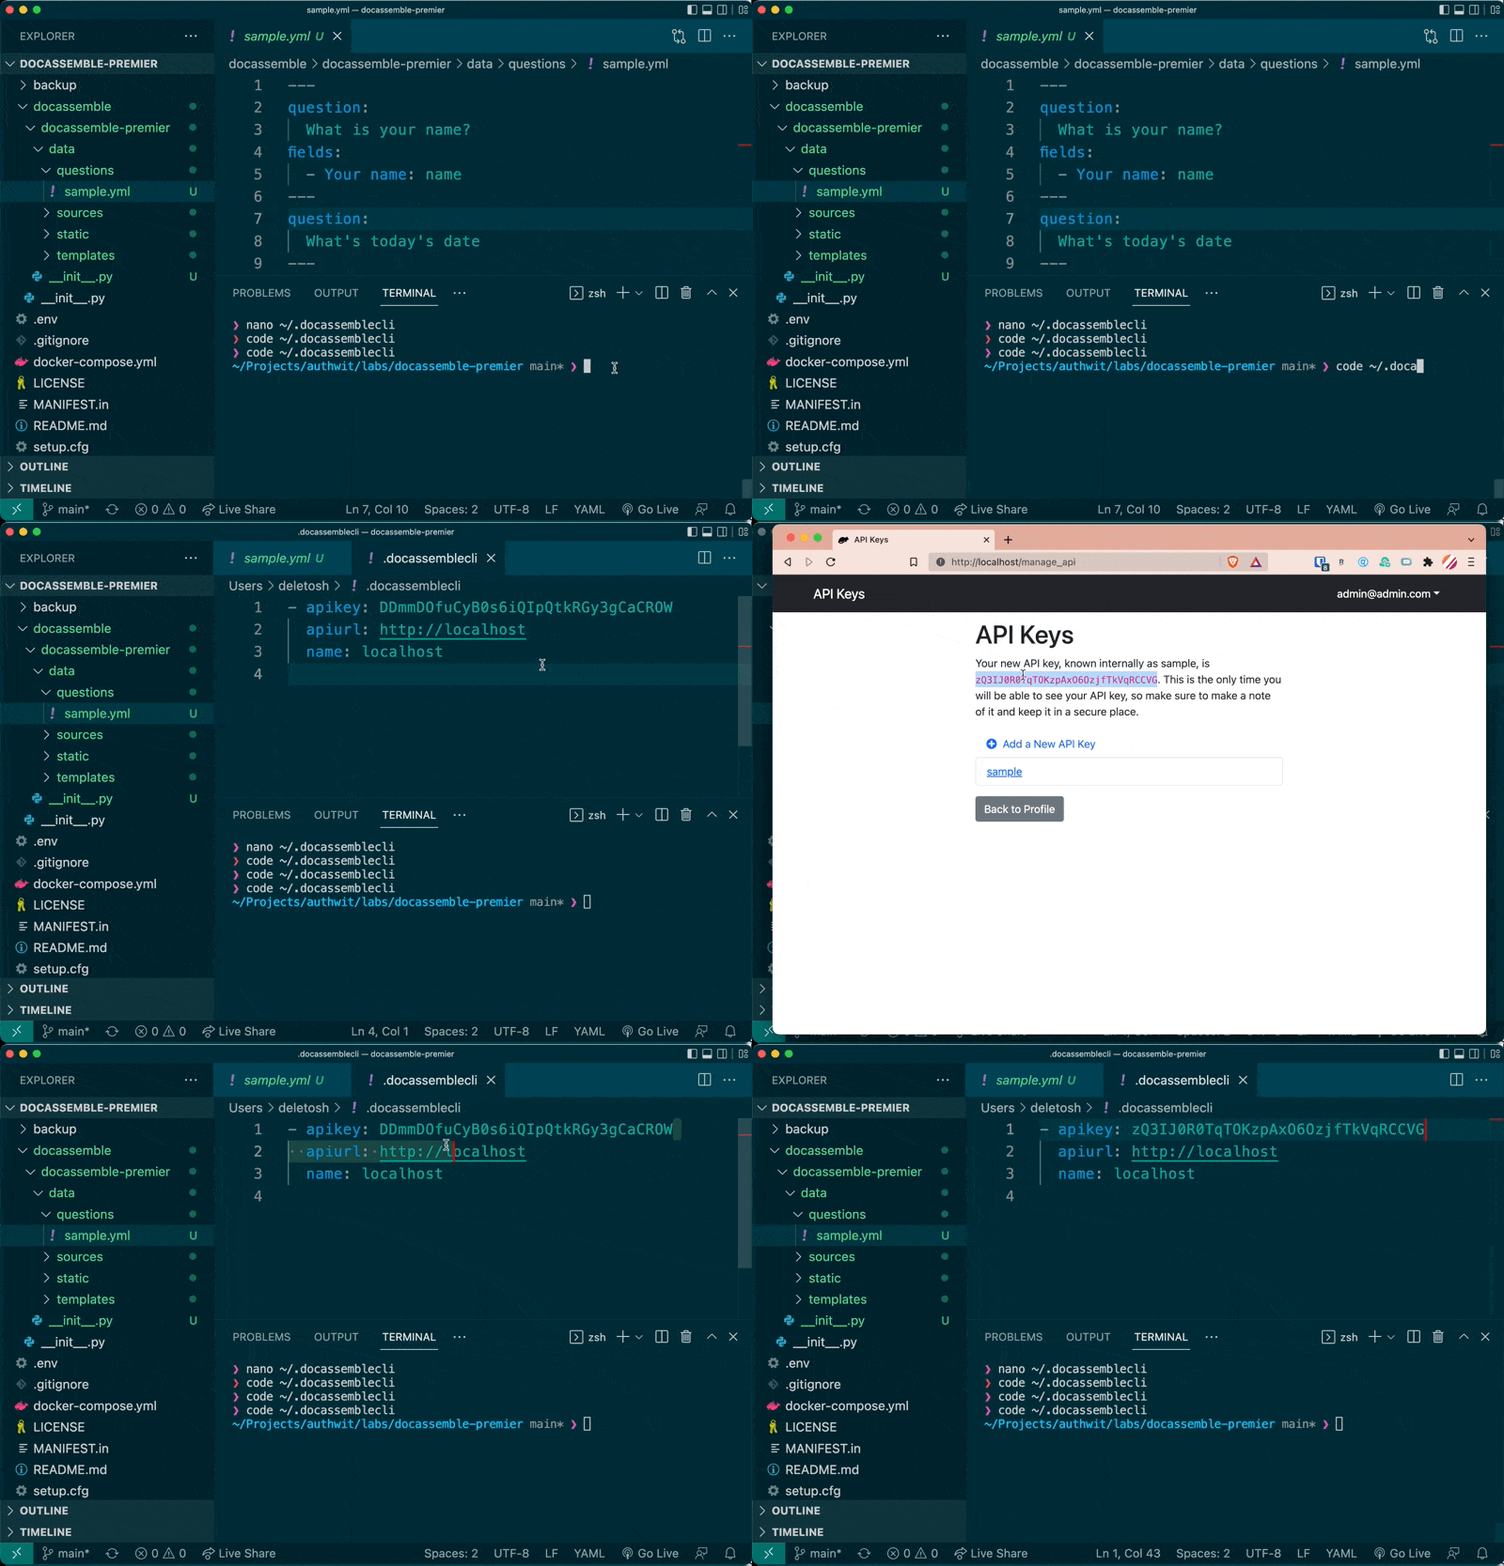
Finally, copy the resulting key
Now, go back into VS Code with the project you previously created open.
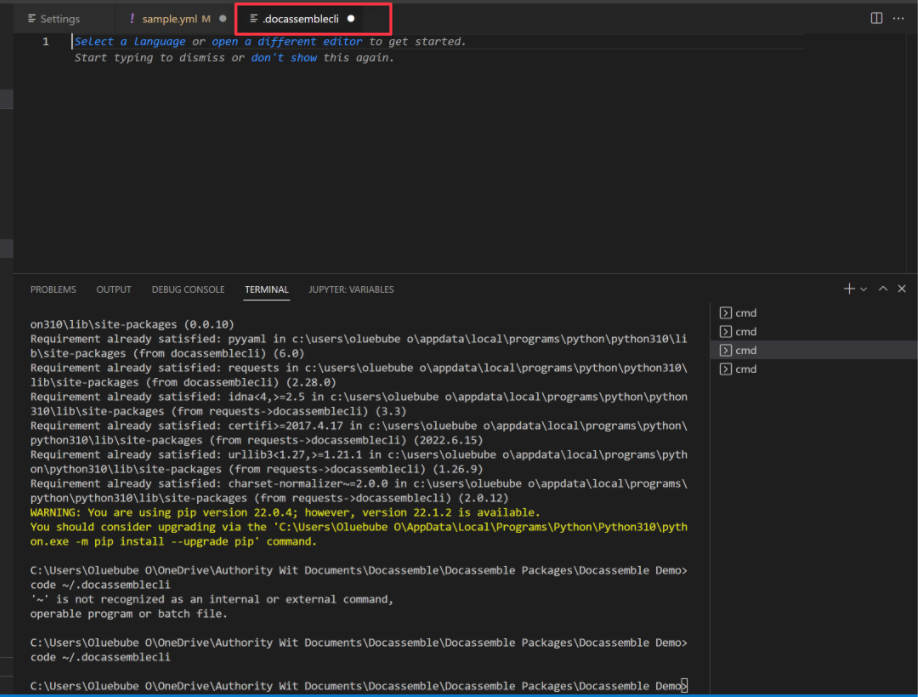
Type code ~/.docassemblecli, this opens a new tab in VS Code.
In this section:
Paste the API code you created in the previous section in the apikey. Save the file or Ctrl + S
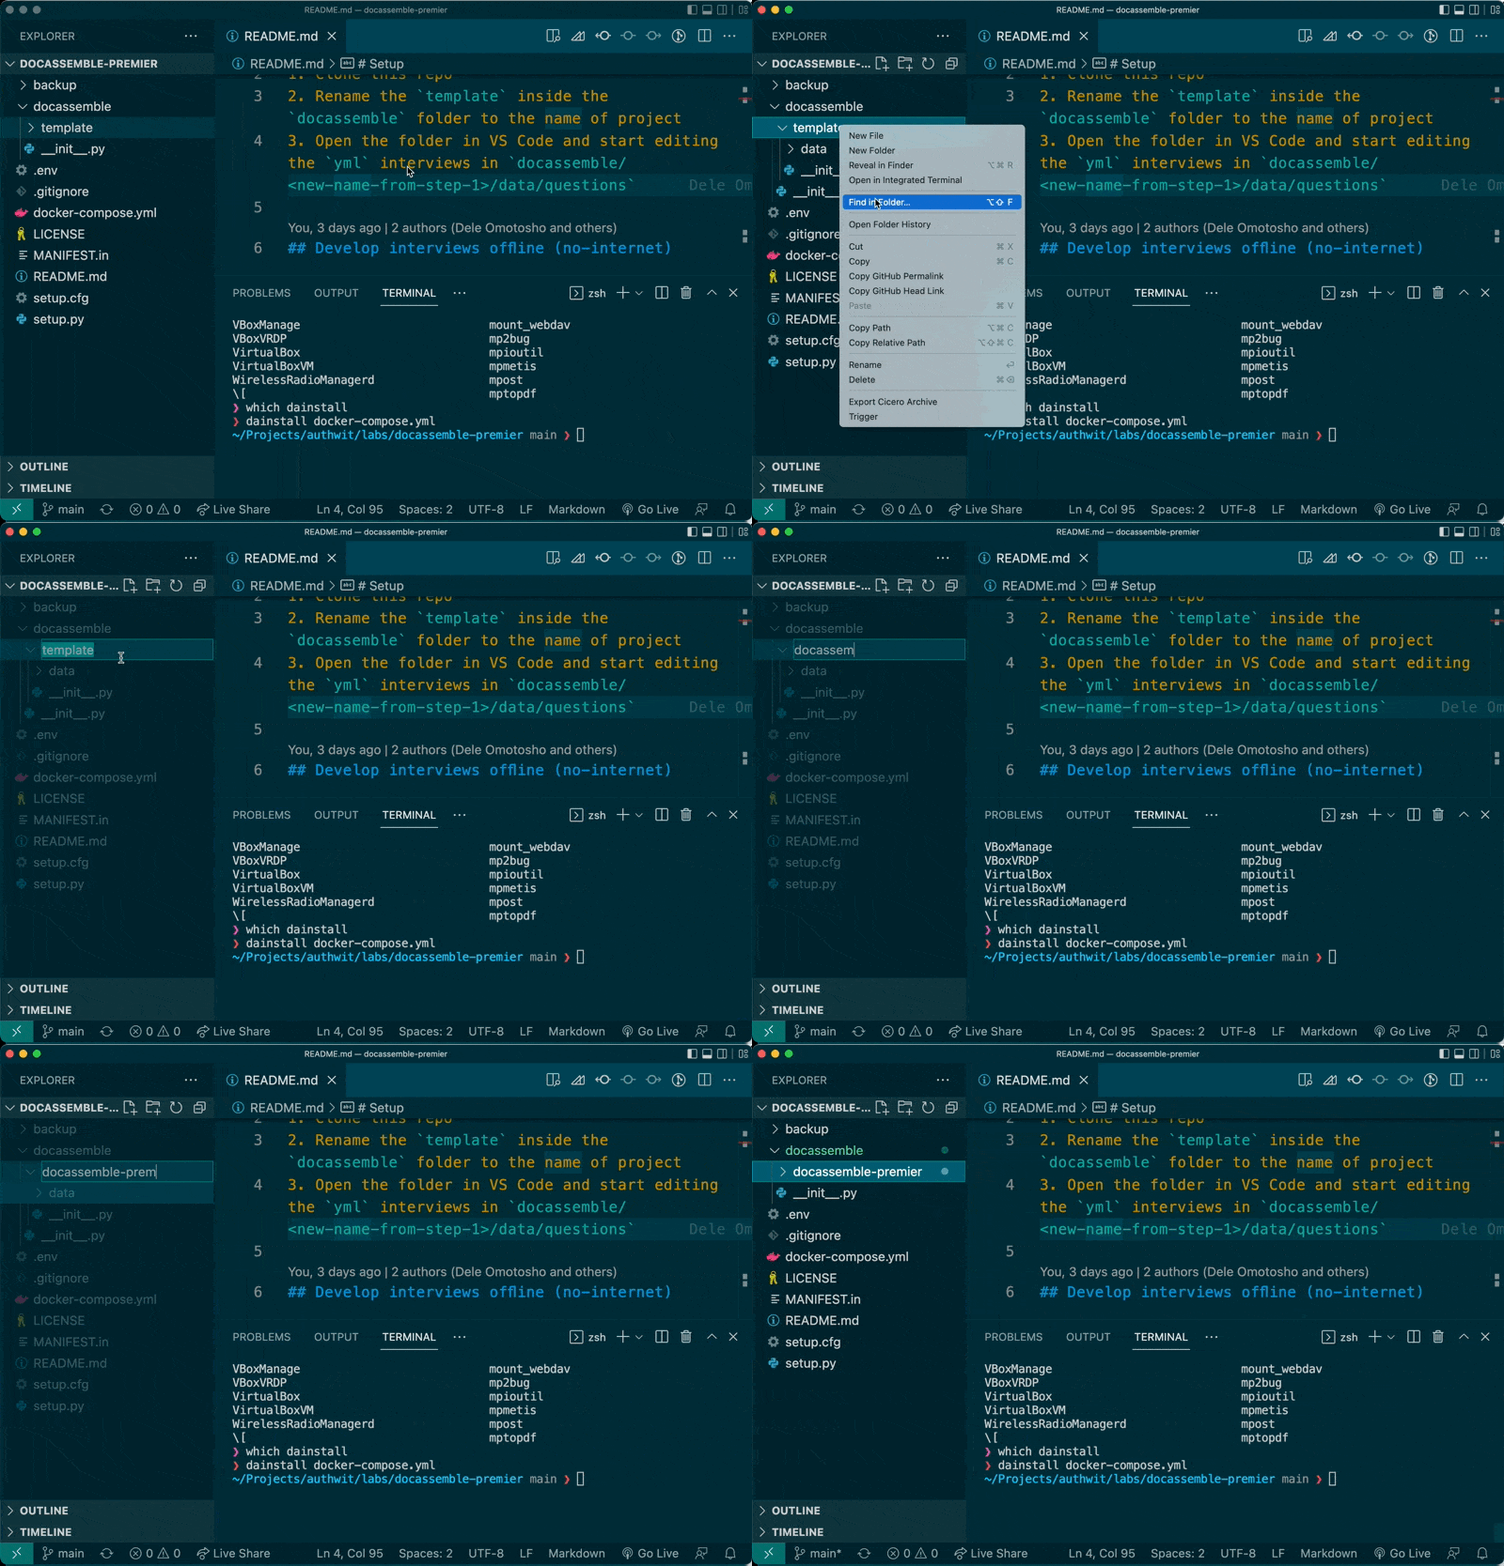
Next, let’s rename the docassemble > template file to docassemble-premier
Let’s now open the sample.yml file
Next, type dainstall --norestart --playground ../docassemble-premier
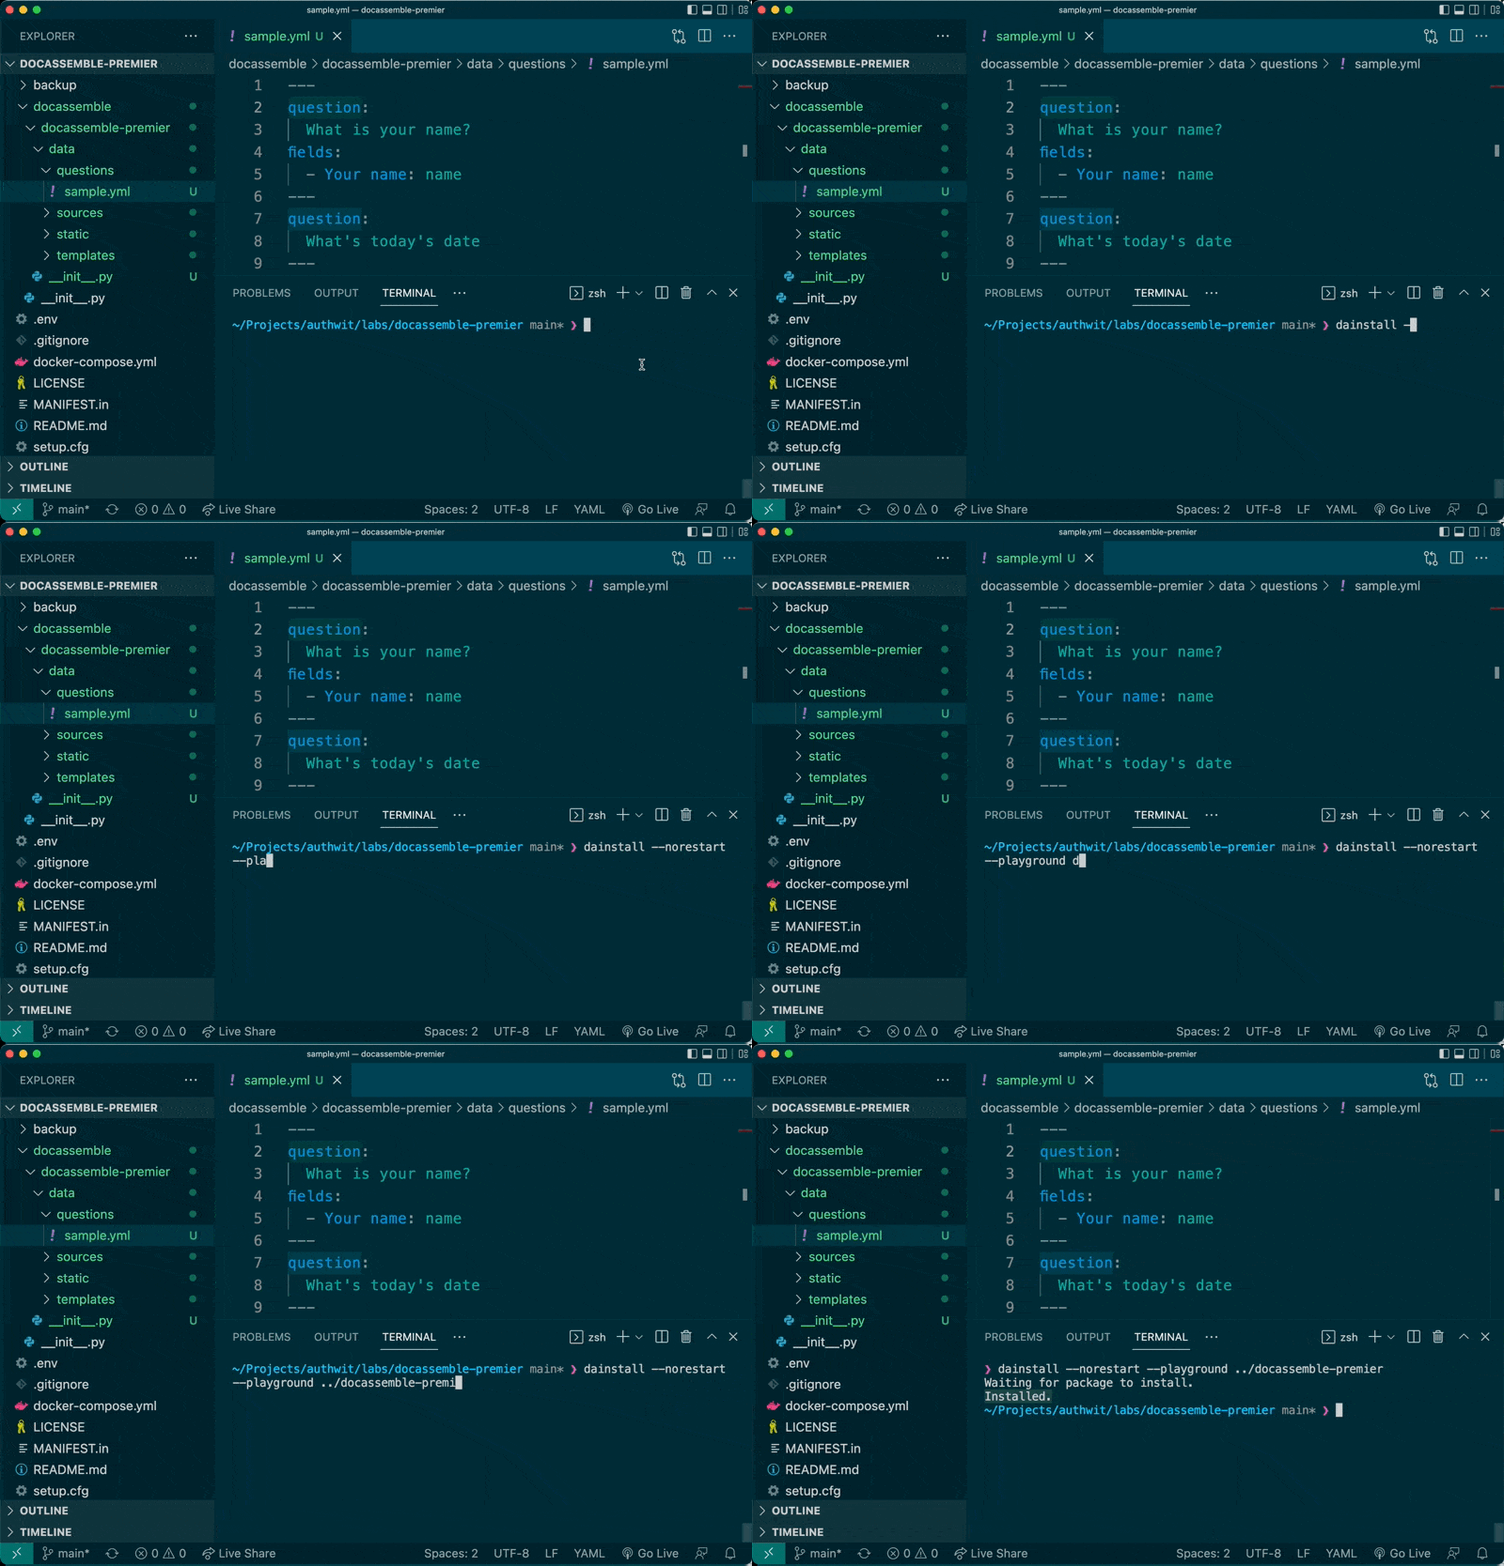
You should see Installed.
You can now go back to the browser at http://localhost, then go to the Playground
Let’s run the code.

You’re now good at developing Docassemble interviews from your system.
How to continue docassemble from locally
As you run your project, here are some things you need to keep in mind:
- Every docassemble project is self-contained and you need to shut down docker and re-start docker in that project.
- When you start a new project, you need to add and re-create your API keys. You cannot use the API key you’ve added before.
Docassemble allows you to automate your document assemble process, and it’s a free alternative to the expensive hotdocs. This setup makes it flexible for you to write your interview and collaborate with other colleagues.
Let me know if you have questions in the comments.


